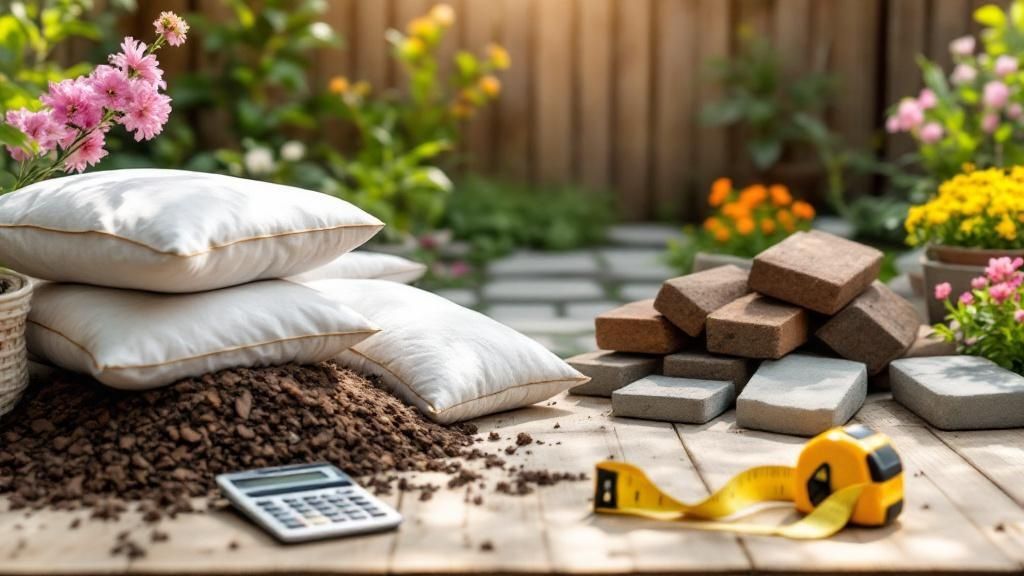
Kicking off a landscape project without a solid cost estimate is a sure-fire way to end up frustrated. A proper landscaping cost estimator is what takes you from a vague idea to a concrete plan, preventing those dreaded budget overruns and making sure your outdoor vision actually happens. Think of it as the foundation for a successful, stress-free transformation.
Why You Can't Just "Wing It" With Your Landscaping Budget
A beautiful landscape doesn't happen by accident, and neither does a well-managed budget. I see it all the time—homeowners get excited about a new patio or a lush garden, so they jump in with only a rough number in mind. More often than not, this leads to disappointment, stalled projects, and a whole lot of financial stress.
The hard truth is that all those little, overlooked expenses add up fast. A simple guess might cover the cost of pavers, but what about the gravel base, the sand, edge restraints, and the rental fee for a plate compactor? Individually, they seem small. But together? They can easily inflate your budget by 20-30% or more.
The Real Price of a Bad Guess
Relying on a ballpark figure puts your entire project at risk. Without a detailed breakdown, you’re not really in control of your spending or the decisions you have to make along the way.
Here are a few of the most common traps I've seen homeowners fall into:
- Underestimating Materials: It's easy to forget about calculating for waste, ordering a little extra (overage), or factoring in the cost of all the necessary components like fasteners and soil amendments.
- Overlooking Labor Pains: Many people don't account for tricky site access (like a narrow gate), the need for extensive grading to get the slope right, or the sheer time it takes for detailed, custom stonework.
- Ignoring the 'Hidden' Fees: Unexpected costs for things like bulk material delivery, debris removal, and equipment rentals can sneak up on you, adding hundreds or even thousands to the final bill.
At Tamura Designs, we've had to console homeowners who had to abandon their dream fire pit or settle for cheaper, less durable materials. Why? Because their initial budget was based on hope, not data. A detailed estimate is what protects your vision from being compromised.
Get a Grip with a Structured Plan
Using a structured landscaping cost estimator gives you something priceless: clarity and command. Instead of staring at one big, intimidating number, you get a line-by-line breakdown of every single component.
This is where you gain real power. It lets you make strategic choices, like deciding to splurge on those gorgeous, high-end capstones for a seating wall while opting for more affordable groundcover in a less visible area.
To help you stay ahead, here’s a look at some common budget blunders and how to avoid them.
Common Landscaping Budget Pitfalls and How to Sidestep Them
This table breaks down frequent budget mistakes in landscaping and offers practical solutions to keep your project on track.
| Common Pitfall | Potential Impact | Proactive Solution |
|---|---|---|
| Guessing material quantities | Running out mid-project, paying extra for rush delivery, or having mismatched batches of materials. | Use a calculator to determine precise amounts. Always add a 10-15% contingency for cuts, waste, and mistakes. |
| Ignoring site preparation costs | Budget blowouts from unexpected grading, demolition, or soil removal needs. | Get a professional site assessment or thoroughly evaluate the area yourself. Factor in costs for clearing, leveling, and drainage from the start. |
| Forgetting about "soft costs" | Permits, design fees, or delivery charges eating into your construction budget. | Research local permit requirements early. Ask suppliers about all delivery and fuel surcharges upfront. |
| Choosing the cheapest labor | Poor workmanship, project delays, and the need for costly repairs down the line. | Vet contractors thoroughly. Check references, review their portfolio, and ensure they are licensed and insured. Quality work is an investment. |
By anticipating these issues, you can build a more resilient and realistic budget from day one.
This kind of detailed planning is more important than ever. With the global landscaping services market valued at around USD 330.58 billion and projected to grow to USD 484.79 billion, it's clear that more and more people are investing in their outdoor spaces. For homeowners managing a large-scale project, mastering accurate job costing is no longer just for the pros; it's essential.
With rising demand and material costs, precision is your best tool for getting the most value for your money. You can learn more from this report on the landscaping services market. Understanding what's at stake is the first real step toward a successful outcome you'll love for years to come.
Accurately Measuring and Mapping Your Project Area
Every great landscaping project starts long before a shovel hits the dirt. It begins with a measuring tape and a piece of paper. Getting precise measurements isn't just a preliminary task—it's the bedrock of your entire plan, the one thing that prevents costly over-orders or the frustration of running out of materials mid-project.
Think of it as creating a blueprint for your yard. This isn't just a rough sketch; it’s a critical tool that feeds directly into your landscaping cost estimator, making sure your budget is rooted in reality from day one.
Mastering the Basics of Measurement
Your first job is to figure out the square footage of each distinct area you plan to work on. For simple, boxy spaces like a rectangular patio or a square garden bed, the math is easy enough: just multiply the length by the width.
But let's be honest, most yards aren't perfect rectangles. You’re going to run into curves, odd angles, and funky layouts.
- For Curvy Garden Beds: Don't let a curve intimidate you. The trick is to break it down into smaller, more manageable shapes. You can often approximate a curve by visualizing it as a series of connected rectangles and triangles. Measure each little piece and add their areas together—you’ll be surprised how accurate the final number is.
- For Circular Patios or Features: Dust off that old high school math. The area of a circle is πr² (pi times the radius squared). Just measure from the center to the edge to get the radius, multiply that number by itself, then multiply the result by approximately 3.14.
- For Triangular Spaces: Have a weird corner garden or an oddly shaped patch of lawn? Use the formula for a triangle's area: (0.5 * base) * height.
Getting these numbers right is absolutely non-negotiable. An error of just a few feet can mean you’ve bought hundreds of dollars in unnecessary pavers or, even worse, you run out of topsoil with one corner of the garden still bare.
Going Beyond Simple Square Footage
A truly useful site map captures much more than just the flat dimensions of your yard. Professionals know that it's the other details—the "hidden" features—that can dramatically affect material needs and labor hours. Your map needs to be a complete record of your property's unique character.
Start with a basic outline of your property, sketching in the main project areas. Then, start layering in the details that matter.
A common mistake we see at Tamura Designs is homeowners forgetting to account for slope. A yard that looks flat might have a subtle grade that requires an extra course of retaining wall blocks or a lot more base material to level a patio, blowing the budget right out of the water.
Make sure you find and mark the locations of:
- Existing Infrastructure: Note every sprinkler head, irrigation line, utility box, and septic tank cover. Hitting one of these by accident can turn your project into an expensive emergency repair job.
- Slopes and Grading: Indicate the direction and steepness of any slope. A noticeable grade will mean more digging and possibly a retaining wall, which adds a substantial cost.
- Sun and Shade Patterns: Mark which spots get full sun, partial shade, or are stuck in deep shade all day. This is vital for choosing plants that will actually thrive.
- Access Points: Where are the gates? The pathways? This dictates how materials get delivered. Can a small Bobcat squeeze through, or does every single thing need to be hauled in by wheelbarrow?
The Power of a Detailed Site Map
Think about the difference between planning a simple 10' x 20' rectangular patio and a winding flagstone path that covers the same total area. The patio is a straightforward calculation for pavers and base. That winding path, on the other hand, involves way more complex cuts, which can easily lead to 15-20% more material waste.
Your detailed map becomes an invaluable tool. It helps you visualize the finished project, get sharper quotes from suppliers, and communicate your vision clearly to a contractor if you hire one. For larger or more complex properties, you might even look into more modern measurement techniques; for example, surveying with drones for fast and accurate results can ensure precision when it really counts.
This mapping phase is where your dream moves from a vague idea to a concrete plan. By taking the time to measure and map accurately, you’re building the solid foundation you need to estimate your costs with confidence.
How to Price Your Landscaping Materials Like a Pro
The materials you choose are really the heart and soul of your landscape design. They dictate the final look, how much maintenance you'll be doing down the line, and, most importantly, the bottom line of your landscaping cost estimator. Getting a handle on these costs is what separates a dream project that gets built from one that stays on paper.
This is where your detailed site map really starts to pay off. With accurate measurements in hand, you can stop thinking in vague ideas and start crunching real numbers. Let's walk through the main material categories—hardscapes, softscapes, and plants—so you can price your project with the confidence of a pro.
This is exactly the kind of careful planning homeowners need to do when estimating their own costs.
Breaking Down Hardscape Material Costs
Hardscaping forms the structural backbone of your outdoor space. Think of the non-living elements like patios, walkways, and retaining walls. Because these materials are built to last and require significant labor to install, they often make up the biggest chunk of a landscaping budget.
Here are some of the most common choices and what you can expect to pay for just the materials:
- Pavers and Flagstone: These are go-to options for patios and walkways. Pavers give you a uniform look and come in countless styles, typically running $4 to $8 per square foot. Natural flagstone offers a more organic, unique feel, with costs often between $5 and $10 per square foot.
- Gravel and Decomposed Granite: If you're aiming for a more rustic vibe or working with a tighter budget, these are fantastic choices. Gravel is one of the most affordable options out there, usually priced by the cubic yard, which works out to around $1 to $3 per square foot.
- Retaining Wall Blocks: If you need to manage a slope, these are essential. Costs can vary widely, from simple concrete blocks at $3 to $7 each to high-end, decorative ones that can easily top $15 per block.
A key tip from our experience at Tamura Designs is to always factor in the "base" materials. For every square foot of pavers, you need a deep base of gravel and a layer of sand. This can add another $2 to $4 per square foot to your material cost. It's an easy detail to overlook but it’s absolutely critical for a patio that won't sink or heave.
Estimating Softscape and Plant Expenses
Softscaping covers all the living, breathing parts of your garden that bring it to life. While generally less expensive per square foot than hardscaping, these costs can add up fast, especially if you're covering a large area.
Here’s a general breakdown:
- Topsoil and Compost: You can't have a healthy garden without good soil. Plan on spending $30 to $60 per cubic yard for a quality topsoil or compost blend. As a rule of thumb, one cubic yard covers about 100 square feet at a 3-inch depth.
- Mulch: This is the finishing touch that helps soil retain moisture and keeps weeds at bay. Mulch costs anywhere from $25 to $70 per cubic yard, depending on whether you choose bark, wood chips, or another type.
- Sod vs. Seed: For an instant lawn, sod is the answer, costing about $0.60 to $1.20 per square foot. If you have more time and patience, seeding is much more economical at just a few cents per square foot.
When it comes to the plants themselves, prices are all over the map. Small perennials might be $10 to $25 each, while shrubs can run from $30 to $100. A young, 15-gallon tree could set you back $150 to $400, and mature specimens can easily run into the thousands.
Especially in our climate, thinking about water usage is just smart planning. For some great ideas, you can explore our guide to creating a beautiful and efficient drought-tolerant landscape design.
Material Cost Comparison for a 150 Sq Ft Patio
To give you a clearer picture of how material choices drive the final cost, let's look at a simple comparison for a standard 150-square-foot patio. This is a great example of the kind of trade-off analysis you should be doing.
| Material Type | Average Cost per Sq Ft | Total Material Estimate | Pros & Cons |
|---|---|---|---|
| Concrete Pavers | $6 | $1,125 (+ base materials) | Pros: Durable, huge variety of styles. Cons: Labor-intensive, higher initial cost. |
| Natural Flagstone | $8 | $1,425 (+ base materials) | Pros: Unique, natural look, very durable. Cons: Irregular shapes make for a trickier install, highest cost. |
| Decomposed Granite | $2 | $450 (+ base materials) | Pros: Very affordable, natural aesthetic. Cons: Can get weedy, needs occasional refreshing. |
As you can see, simply choosing decomposed granite over flagstone for this small patio could save you nearly $1,000 in material costs alone. This is exactly why a detailed estimate is so powerful—it lets you make informed decisions that align your vision with your budget.
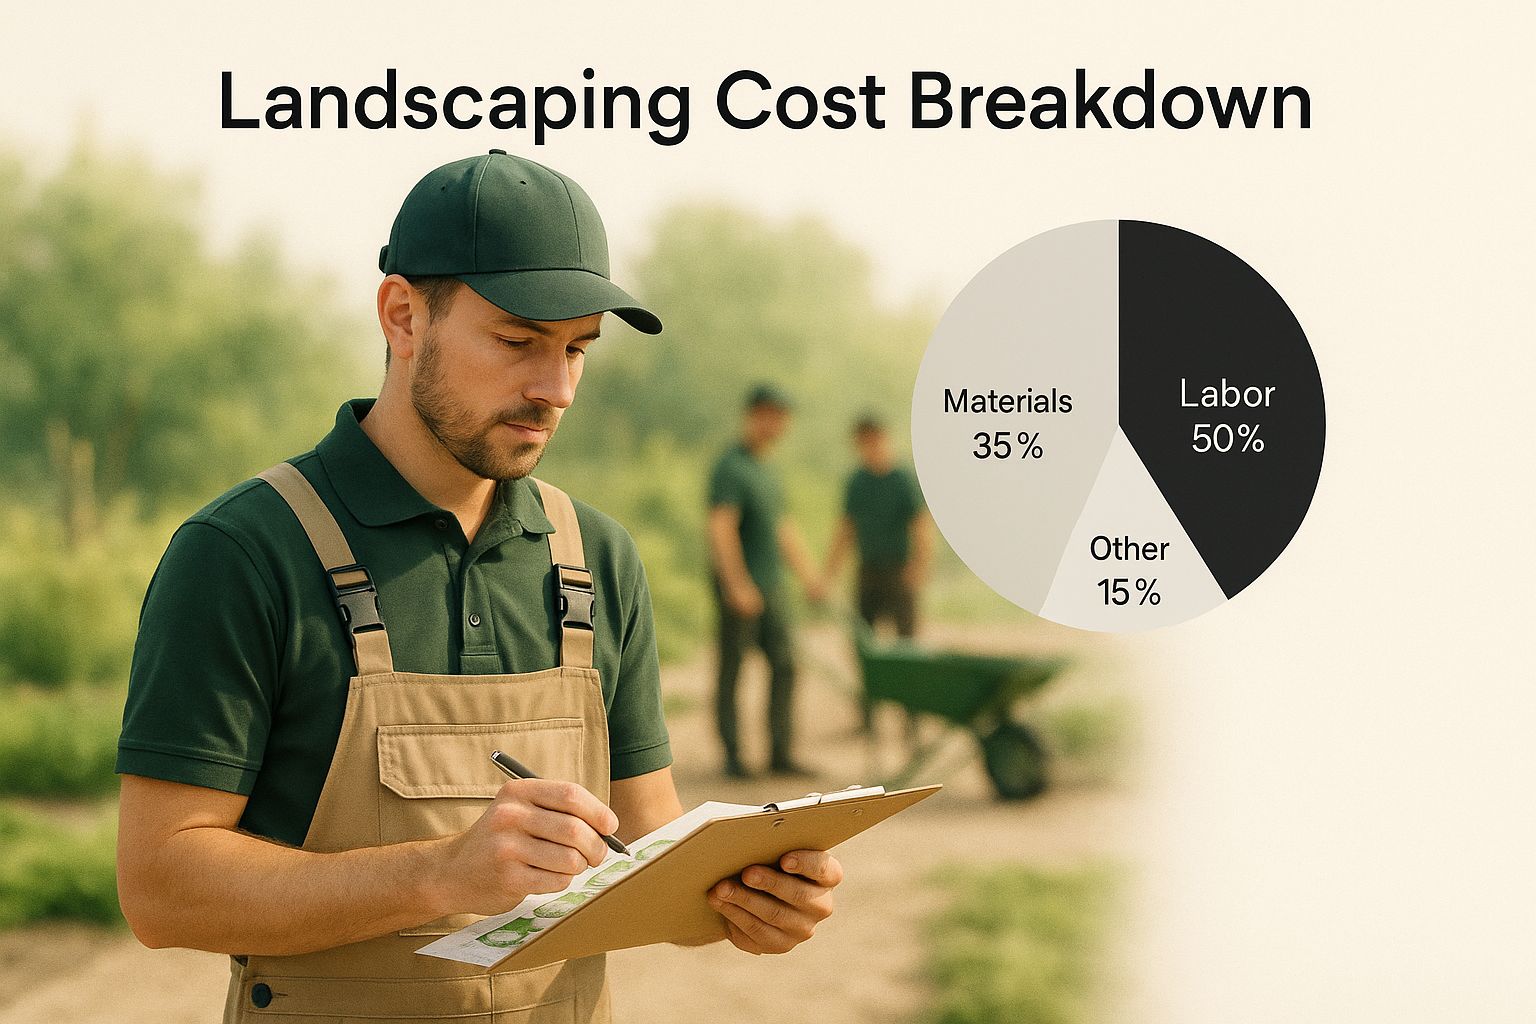
Figuring Out the Real Cost of Labor and Equipment
It’s easy to focus on the price of pavers, plants, and mulch. You can see them, touch them, and add them up on a receipt. But materials are only half the picture. The real cost—and the part most people underestimate—is the labor and equipment needed to turn that pile of supplies into a finished landscape.
This is where budgets get blown, especially on DIY projects. Whether you’re hiring a pro or doing it yourself, getting a grip on these costs is what makes a budget realistic. And people are definitely investing in their yards—the U.S. landscaping market is a massive USD 116 billion industry, with homeowners spending big to improve their curb appeal. You can see more details in these current lawn care industry statistics on fieldcamp.ai. It just goes to show how much getting the final product right matters.
Estimating Professional Labor Costs
When you hire a landscaping crew, you're not just paying for a few people to dig holes. You're investing in their experience, their efficiency, and the peace of mind that comes with proper insurance. You're also paying for the professional-grade equipment they bring, which makes a world of difference.
Labor rates vary quite a bit depending on where you live and how complex the job is, but a good ballpark figure is $50 to $100 per person, per hour.
That hourly rate usually covers:
- Wages and Insurance: The crew's pay, plus critical coverage like workers' compensation and liability insurance.
- Overhead: The hidden costs of running a business—think trucks, tools, fuel, and administrative time.
- Expertise: The skill to build a stone wall that won't fail or create a planting design that thrives. This is what you're really paying for.
A professional crew can often knock out a project in a fraction of the time it would take a homeowner. That speed can sometimes make hiring them more cost-effective than you’d think, especially for larger, more physically demanding jobs.
A common mistake is to compare a pro’s hourly rate to what you think your own time is worth. An experienced three-person crew might install a paver patio in two days. That same job could easily eat up two full weekends of back-breaking work for a homeowner. Their efficiency is a huge value.
The Hidden Costs of DIY Labor
Going the DIY route can absolutely save you money on direct labor costs, but don't fall into the trap of thinking your labor is "free." Your time has value, and DIY projects come with their own set of hidden expenses that need to be in your estimate.
Think beyond just the materials. Putting in a new lawn isn't just about scattering some seed. It often means renting a tiller to break up compacted soil and a heavy lawn roller to press the seed down for good contact. Those costs add up.
Your DIY Equipment and Disposal Checklist
Here’s a realistic list of those "hidden" costs you need to factor into your landscaping cost estimator:
- Equipment Rentals: You probably don't have a plate compactor for your patio base or a sod cutter sitting in your garage. Renting specialized machinery can run you $75 to $150 per day.
- Delivery Fees: You can't exactly toss a few cubic yards of topsoil or a pallet of flagstone into the back of your sedan. Expect delivery fees between $50 and $200+ per trip.
- Waste Disposal: What are you going to do with the old concrete from a busted-up patio or the dirt you excavated for a new garden bed? Renting a small dumpster or paying fees at the local dump is a necessary expense. For a bigger job like building a retaining wall, these costs can be substantial. If that's on your list, our guide on the cost of a retaining wall breaks down the full scope.
- Tools and Supplies: Even small things add up. You might need to buy a better shovel, a contractor-grade wheelbarrow, landscape fabric, or a diamond blade for your saw to cut pavers. These purchases can easily tack on a few hundred dollars to your total.
By thinking through both the cost of professional work and the true, all-in cost of a DIY project, your estimate becomes a much more reliable financial tool. It forces you to account for the total effort involved, not just the parts you can hold in your hand.
Assembling Your Final Budget and Contingency Plan
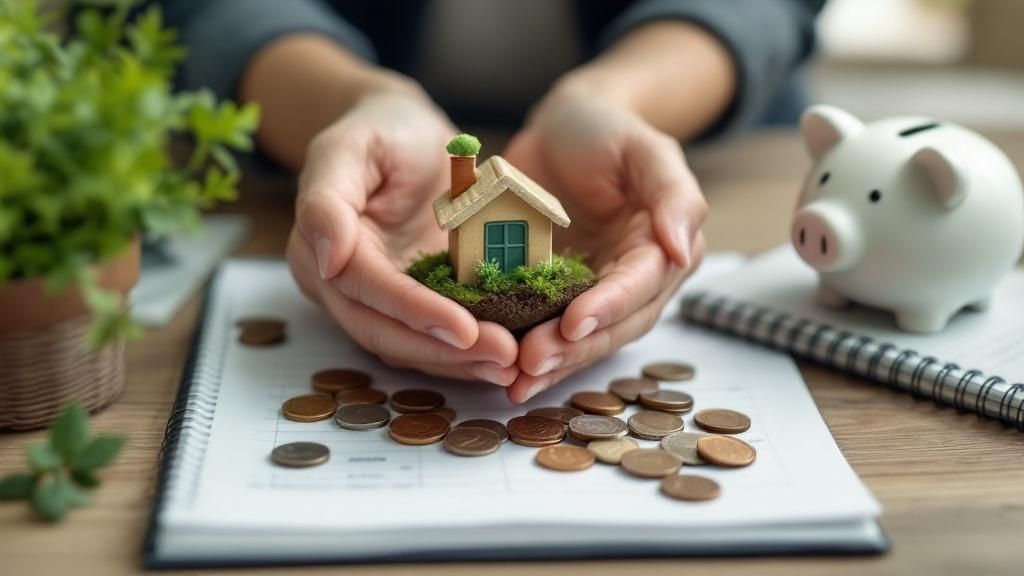
Alright, you've done the real legwork. You've measured your space, priced out every last paver and plant, and put a number to the labor involved. Now it's time to pull all those threads together into a single, cohesive budget. This is the moment of truth—where the dream gets a final price tag so you can make smart decisions before a single shovel hits the dirt.
This step is all about moving from a scattered list of expenses to a real, workable financial plan. It’s where your landscaping cost estimator spreadsheet truly shines, turning all those numbers into a clear summary of your total project investment.
Creating Your Master Cost Sheet
The goal here is simple: get everything consolidated in one place. You should have clear subtotals for your hardscape materials, all your softscape costs, and your total estimate for labor and equipment. When you add these three main categories together, you’ll have your base project cost.
To make this as painless as possible, we’ve created a tool that follows the exact steps you just walked through.
Download Our Free Landscaping Cost Estimator Template
You can plug your numbers directly into our pre-built spreadsheet. It has all the categories laid out for you—from base gravel and plant costs to dumpster rental fees. This template does all the math, helping you create a detailed and reliable budget in minutes.
Using a spreadsheet, whether you build your own or use our template, is the best way to see the complete financial picture. It lets you instantly see how swapping out one material for another affects the bottom line, giving you total control over the final budget. Gaining a wider view of how contractors approach pricing can also be helpful; for instance, some resources do a great job of decoding home improvement installation costs in other trades, which offers a broader perspective on project budgeting.
The Most Important Line Item: The Contingency Fund
Once you have your total project cost, you’re not quite done. There’s one more critical number to add, and it's the one that homeowners almost always forget. I’m talking about your contingency fund, and it’s arguably the most important part of any responsible budget.
Think of a contingency fund as a safety net. It’s a separate chunk of money—usually 10% to 20% of your total project cost—set aside specifically for the unexpected. This isn't "extra" cash for upgrades; it's an essential buffer for the unknowns that are a natural part of any construction project.
It’s basically project insurance. What happens if the crew hits a massive, buried boulder during excavation that has to be broken up and hauled away? What if a freak thunderstorm washes out your freshly laid paver sand?
These things aren't a sign of bad planning; they are just reality. Without a contingency, these small hiccups can derail your entire project or force you to make painful cuts somewhere else.
Calculating and Managing Your Contingency
How much you should set aside really comes down to your project's complexity and your own tolerance for risk.
- For straightforward projects, like laying sod on a flat, prepped lawn, a 10% contingency is probably fine.
- For complex jobs that involve things like a multi-level patio on a sloped yard with drainage issues, aiming for 15-20% is much, much wiser.
So, if your total estimated cost is $15,000, a 15% contingency would be $2,250. This brings your total prepared budget to $17,250. If everything goes perfectly? Great, you have that money left over. But if something goes wrong, you can handle it without breaking a sweat. This fund is what keeps your project on track and ensures you stay in control.
And for keeping your new landscape looking great after the work is done, our comprehensive landscape maintenance checklist has you covered.
Answering Your Biggest Landscaping Cost Questions
Even with the best plan in hand, you're bound to have questions. It’s completely normal. When you’re looking at a major investment like landscaping, a few uncertainties can feel overwhelming. Let’s clear up some of the most common questions we hear from homeowners. Getting these answers will help you firm up your budget and move forward with confidence.
While our landscaping cost estimator is the best tool for a truly personalized budget, these answers provide some solid ground rules. Think of them as the big-picture insights almost every homeowner needs during the planning stage.
How Much Should I Really Budget for a Full Backyard Renovation?
This is the million-dollar question, isn't it? The most honest answer is always "it depends," but that's not very helpful. So, here’s a real-world rule of thumb that we've seen hold true for years: plan to invest between 5% and 15% of your home's total value for a professional, comprehensive landscape overhaul.
Let's put that into perspective. For a $500,000 home, you're looking at a realistic budget of $25,000 to $75,000. Why such a huge range? It all comes down to the details:
- Your Project's Scope: A simple refresh with new plants and sod will naturally fall on the lower end. But if you’re dreaming of a multi-level patio, an outdoor kitchen, and sophisticated lighting, you’ll be pushing toward that higher number.
- The Quality of Materials: Choosing standard concrete pavers versus premium natural flagstone can shift the final price by thousands.
- Local Labor Rates: The cost of skilled labor varies significantly from one area to another.
A detailed estimate from a pro takes these variables and turns that vague percentage into a hard number you can actually plan around.
What’s the Biggest Hidden Cost I Should Watch Out For?
If there's one thing that consistently catches homeowners by surprise, it's site preparation and demolition. It’s easy to get excited about the beautiful new features—the pavers, the plants, the fire pit—and budget for them meticulously. What often gets overlooked is the work required to clear the slate first.
We’re talking about the not-so-glamorous but essential tasks like:
- Breaking up and hauling away an old, cracked concrete patio.
- Excavating and grading a sloped yard to create a usable, level surface.
- Removing large, established trees or a jungle of overgrown shrubs.
This work is heavy, labor-intensive, and often requires specialized machinery. That's why that 15-20% contingency fund isn't just a casual suggestion—it's an absolute necessity for any realistic budget.
Can I Save Money by Doing Some of the Landscaping Myself?
Absolutely. You can save a tremendous amount of money by taking a DIY approach where it makes sense. Labor typically makes up 40% to 60% of a project's total cost, so rolling up your sleeves can lead to very real savings. If you enjoy physical work and have the time to commit, it's a fantastic way to stretch your budget.
Just be honest with yourself about your skill set and the tools at your disposal. Things like planting, spreading mulch, or laying sod are perfect for a weekend warrior. But projects that involve gas lines for a fire pit, complex electrical wiring for lighting, or building a tall retaining wall are best left to licensed professionals. A mistake there isn't just costly; it can be downright dangerous.
A hybrid approach is often the smartest play. Hire experts for the heavy lifting and technical work, then save money by handling the finishing touches yourself.
What Costs More: Hardscaping or Softscaping?
Hands down, hardscaping is more expensive on a per-square-foot basis than softscaping. The reason is twofold: the materials themselves cost more, and the labor is far more intensive and skilled. Building a stone patio or a retaining wall requires a compacted base, precise cuts, and a lot of heavy lifting.
- Hardscaping: Think patios, decks, retaining walls, and walkways. Higher material cost, higher labor cost.
- Softscaping: This includes your plants, soil, mulch, and lawn. Lower material cost, lower labor cost.
If you're working with a tighter budget, one of the best strategies is to focus your funds on a smaller, high-impact hardscape area. You can create a stunning patio and then use more affordable, creative softscaping to fill out the rest of the yard. This gives you that lush, finished look without the high price tag of wall-to-wall pavers.
Ready to transform your vision into a stunning reality? For over 30 years, Tamura Designs has been creating award-winning outdoor spaces across Silicon Valley. Let's build something beautiful together.