Why Permeable Pavers Are Changing The Patio Game
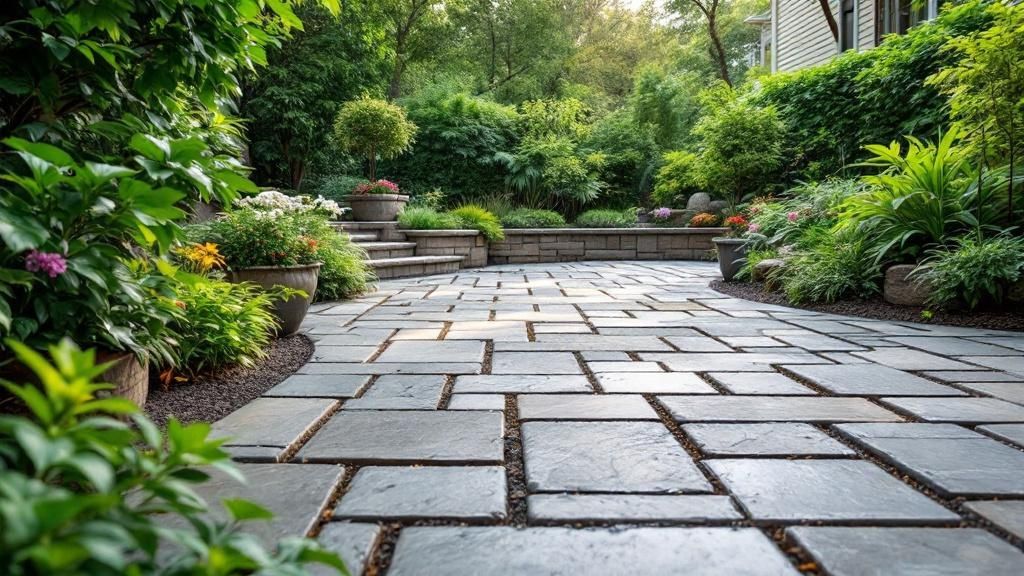
When you start planning a new patio, your mind probably jumps to a solid surface of stone or concrete. That’s been the go-to for years. But what if the biggest improvement in patio design isn't about the surface at all, but what’s happening underneath it? A permeable pavers patio is more than just a new option; it's a smarter way of thinking about outdoor living spaces, solving real problems that old-school patios can make worse.
Say goodbye to those annoying puddles that form after a rainstorm or watching your mulch wash out of your garden beds from uncontrolled runoff. A permeable system is built to let water pass directly through it, much like natural, undisturbed ground absorbs rainfall. This simple but effective design directly tackles the headaches many homeowners just assume come with having a patio. Instead of fighting nature, you get to work with it. This practical benefit is a huge reason why more people are choosing permeable pavers over solid surfaces.
More Than Just Puddle Prevention
The advantages of a permeable paver system extend well beyond just keeping your patio dry. By allowing rainwater to soak into the ground, these patios help recharge local groundwater tables. This is especially important in areas that face drought conditions. The environmental impact is significant, as it eases the burden on city storm sewers and helps keep pollutants from washing into our streams and rivers.
This growing understanding is fueling a major market shift. The global pervious pavement market, which includes residential projects like a permeable pavers patio, was valued at USD 7,778.72 million in 2022 and is expected to grow to nearly USD 14,920.30 million by 2033. This shows that permeable systems are quickly becoming a mainstream choice for sustainable building.
Aesthetics and Innovation Working Together
A common misconception is that choosing a permeable system means you have to sacrifice style. That couldn't be more wrong. The design possibilities are just as broad and beautiful as with any traditional paver. Whether you love the classic look of cobblestone or prefer sleek, modern geometric shapes, you can achieve the exact look you want. You can see how flawlessly these systems fit into high-end designs by checking out some of our landscape construction blogs.
The real difference is hidden in the layers beneath the surface—a special base made of open-graded aggregate that creates a reservoir. This allows water to collect and slowly filter into the soil. This engineered base is the key to a functional, long-lasting installation. The move toward permeable pavers is just one example of new thinking in home improvement. Looking at the bigger picture, the entire construction industry is seeing exciting developments, such as the growing role of robotics in construction. This forward-thinking approach, focused on performance and sustainability, is why permeable pavers are no longer a niche product but a top choice for homeowners who want beauty, function, and lasting value.
Reading Your Site Like an Expert
Before you even think about ordering pavers or picking up a shovel, the most important work on your project begins: getting to know your property. This is the exact spot where a lot of DIY dreams run into trouble. A successful permeable paver patio isn’t just an afterthought dropped onto your lawn; it’s a system designed to work with your yard's unique character. Spending a little time upfront to assess your site like a pro will save you from major headaches and ensure your new patio works as it should for years to come.
First, let's play detective and see where the water wants to go. Head outside after a good rain and observe your chosen spot. Are puddles forming? Do you see water flowing in sheets across the grass and pooling up against your house? These drainage patterns are clues. A permeable system is designed to fix these problems, but you need to know the challenge you're facing. Your goal is to build a patio that not only soaks up the rain falling on it but also helps manage runoff from your roof or nearby slopes.
Getting a Feel for Your Foundation: Soil and Slope
The ground under your future patio is the single most critical element. Your soil type dictates how fast water can drain away and, in turn, how deep your stone base needs to be. You don't need a degree in geology for this; a simple DIY percolation test will tell you a lot.
Dig a hole about one foot deep and one foot wide in your patio area. Fill it with water and let it drain out completely. Now, fill it a second time and track how much the water level drops in one hour. If it drops at least a half-inch to an inch per hour, your soil probably drains well enough for a standard installation. If it drains much slower, you're likely dealing with heavy clay. This doesn't mean your permeable patio plans are sunk, but it does mean you'll need a more robust base—likely deeper with larger, open-graded stone—to create a bigger reservoir for the water.
Just as important is the slope, or the grade, of your land. A perfectly flat patio can still struggle with surface water during a massive downpour. Your site should ideally have a gentle slope of at least 1-2% away from your house. That’s about a one to two-inch drop for every eight feet of patio. This subtle tilt ensures that any water your pavers can't absorb during a huge storm is directed away from your foundation, giving you an extra layer of protection. You can easily check this with a long, straight 2×4 and a standard level.
Before you get too far in the planning, it's wise to complete a quick site assessment. This checklist can help you spot potential issues before they become expensive problems.
Site Assessment Checklist for Permeable Paver Installation
A comprehensive checklist covering soil conditions, drainage requirements, slope measurements, and site preparation factors.
| Assessment Factor | Ideal Condition | Red Flags | Action Required |
|---|---|---|---|
| Soil Type | Sandy or loamy soil; drains at least 1 inch per hour. | Heavy clay; water stands for hours after filling the test hole. | Plan for a deeper (12"+) open-graded aggregate base to act as a reservoir. |
| Slope/Grade | Gentle slope of 1-2% moving water away from structures. | Flat ground or a slope directing water toward the house. | Regrade the area to create a positive slope. Consider installing a French drain. |
| Existing Drainage | No standing water; water drains away from foundation. | Puddles, soggy spots, or water pooling near the foundation. | The permeable system should be designed to capture and manage this runoff. |
| Underground Utilities | Clear area with no known utilities. | Proximity to known utility lines (gas, water, electric). | Call 811 to have public utilities marked. Probe gently for private lines (irrigation, low-voltage lighting). |
This checklist helps translate your observations into concrete actions, ensuring you prepare the site correctly for a long-lasting and effective permeable patio.
Uncovering Hidden Surprises
The last thing you want is for your first scoop of dirt to hit a water line or electrical cable. Before you do any digging, you must call your local utility locating service. In the U.S., this is the 811 "Call Before You Dig" service. They will come out and mark the location of public utilities for free. Don’t forget to account for any private lines you might have installed yourself, like sprinkler systems or wiring for landscape lights.
Thinking through these site-specific details—drainage, soil, slope, and utilities—is what sets a great project apart from a failed one. This careful planning also helps you select the right materials for your specific situation and style.
This simple decision tree can help you narrow down your paver choices based on your patio's intended use, aesthetic goals, and budget.
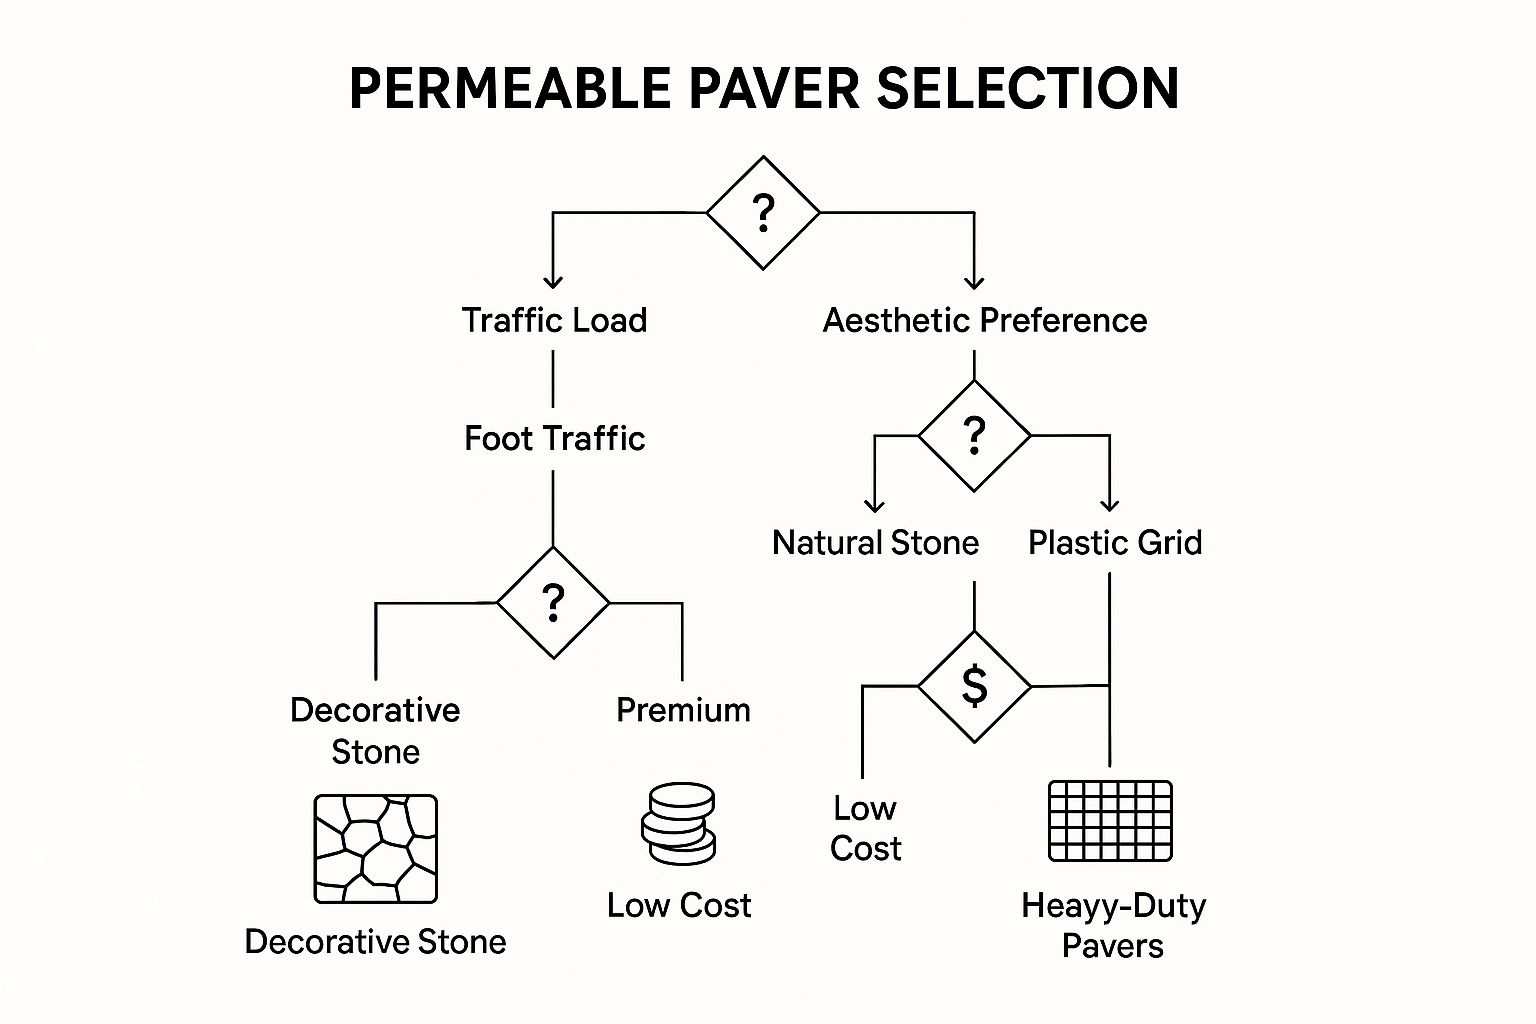
As the infographic shows, your practical needs—like whether the patio needs to support a car—are the first thing to consider. From there, you can branch into style and budget to find the perfect material for your project.
Materials That Actually Perform In Real Conditions
With your site analysis complete, you get to the fun part: picking the materials that will shape your permeable pavers patio. This is where your vision truly starts taking shape. But it's also a critical stage where the wrong choice can undermine your project's durability. Not all pavers are made the same, and your final decision should come down to your site's specific needs, your personal style, and your budget. Let’s look at the options that hold up in the real world, not just in slick brochures.
The Great Paver Debate: Concrete vs. Clay and Beyond
When you think of pavers, Permeable Interlocking Concrete Pavers (PICPs) probably come to mind. They are the industry standard for good reason. PICPs are engineered for serious strength and come in a huge array of shapes, sizes, and colors, giving you a ton of design freedom. Whether you're picturing a classic brick layout or modern, large-format slabs, there’s a concrete paver to match. They are also incredibly resilient and built to handle everything from constant foot traffic to cars, making them a solid all-around choice.
The market backs this up. The global pervious concrete pavers market was valued at $9.13 billion in 2023 and is still growing. More than 45% of this demand comes from major infrastructure projects, which speaks volumes about their reliability under tough conditions. You can read more about these market trends and the growth of pervious concrete to understand just how trusted this technology has become.
For a different vibe, you might lean toward permeable clay pavers. They provide rich, earthy colors that won’t fade, giving your patio a classic, timeless look. While they are certainly beautiful, they can be more brittle than concrete pavers and may be more prone to cracking in regions with harsh freeze-thaw cycles. They also tend to come with a higher price tag.
Another option gaining traction is a plastic grid system. Think of these as plastic, honeycomb-like grids that you fill with either decorative gravel or even grass. This approach is fantastic for creating a more natural, "green" surface that is still stable and permeable. They are a great fit for low-traffic zones or driveways where you want to blend the hardscaping with the surrounding landscape.
To help you decide, here's a quick comparison of the most common materials.
Permeable Paver Material Comparison
This table breaks down the key differences between popular paver materials to help you choose the best fit for your patio project.
| Material Type | Cost Range (per sq. ft.) | Lifespan | Maintenance Level | Best Climate |
|---|---|---|---|---|
| Concrete Pavers (PICP) | $4 – $10 | 25-50 years | Low to Moderate | All climates, very durable in freeze-thaw |
| Clay Pavers | $8 – $20 | 50+ years | Low | Milder climates, can be brittle in extreme cold |
| Plastic Grid System | $3 – $8 | 20-40 years | Varies (depends on fill) | All climates, excellent for drainage |
| Natural Stone | $15 – $35+ | 50-100+ years | Low | Varies by stone type (e.g., granite is very durable) |
As you can see, concrete pavers offer a great balance of cost, durability, and versatility. While clay and natural stone have a longer lifespan, their higher cost and potential climate limitations are important considerations.
Don't Overlook the Unsung Heroes: Base Materials
The pavers are what you see, but what lies underneath is what makes the whole system work. The performance and longevity of your permeable pavers patio truly depend on the quality of its foundation.
- Geotextile Fabric: This is the first layer you’ll put down after digging out the area. It’s a specialized fabric that separates your native soil from the aggregate base. This is crucial because it stops the stone from sinking into the ground and prevents soil from working its way up and clogging the base. Do not skip this step.
- Aggregate Layers: A permeable base is more than just a pile of gravel; it's a carefully planned system of different-sized, clean stones. You’ll typically have a deep sub-base of larger, clean-crushed stone (like ¾" aggregate) to hold water, topped with a thinner bedding layer of smaller stone (like ¼" aggregate). This smaller stone creates the smooth, level surface needed to set the pavers perfectly.
- Edge Restraints: Without these, your patio will literally fall apart at the seams. Specialized restraints are installed around the perimeter to lock the pavers in and keep them from shifting over time. They are absolutely essential for the patio’s structural integrity.
Getting this combination of materials right is a fundamental part of the landscape design and installation. When you specify the correct materials from the ground up, you ensure your patio doesn't just look amazing on day one but functions as it should for years to come.
Foundation Work That Prevents Future Problems
Let's get into the part of building a permeable pavers patio that truly separates a project that lasts a lifetime from one that starts sinking and shifting after just a few seasons. The foundation work is everything. It isn’t as exciting as laying the final paver, but this is where the real engineering happens. Get this right, and you'll prevent almost every common patio problem before it even has a chance to start.
The process kicks off with excavation, and this is more than just digging a hole. The depth is dictated by your specific site conditions. If you're working with well-draining sandy soil, you might only need to dig down 8 to 10 inches. But for heavy clay, you’ll need to go deeper—often 12 to 18 inches or more—to create a large enough underground reservoir for water. Your aim is to remove all the topsoil and organic material until you hit stable subsoil. It's also during this stage that you'll establish that crucial 1-2% slope away from your home's foundation, giving any overflow water a safe path to travel.
Building the Base Layer by Layer
Once your site is dug out and graded, it’s time for the first and arguably most important material: the geotextile fabric. Think of this as the security guard for your patio's base. You'll lay this tough, permeable fabric across the entire excavated area. It stops the native soil from mixing with and eventually clogging your clean stone base. A base contaminated with soil will fail, so this is a non-negotiable step that protects the entire system’s permeability.
On top of the fabric, you'll start adding the aggregate base in "lifts," or layers. The first layer is the sub-base, usually made of a ¾-inch clean, angular stone. You’ll add this in 3-4 inch increments, compacting each layer thoroughly with a plate compactor before adding the next. This brings up a critical point: you can't just dump all the stone in and level it. Proper compaction is what locks the angular stones together, creating a stable, unmoving foundation. Skipping this leads directly to the sinking and settling that ruins poorly built patios.
After the sub-base is built up to the required height, you’ll add the bedding layer. This is a much thinner layer, about 1-2 inches deep, made of a smaller ¼-inch clean chip stone. This layer gives you a smooth, easily leveled surface to set the actual pavers on. You won't compact this layer until after the pavers are laid.
This careful approach to building a strong foundation is why permeable systems are becoming so popular for home projects. This preference is actually driving major market growth. The global permeable paver system market, valued at about $5,670.5 million in 2025, is expected to grow as more homeowners opt for sustainable and durable outdoor solutions. You can see the data behind this trend and how residential demand is shaping the future of landscaping in this market analysis on permeable paver systems.
The Essential Finishing Touches of the Foundation
Before you even think about setting a single paver, there's one more foundational piece to install: edge restraints. These are heavy-duty plastic, concrete, or metal strips that you'll stake down securely around the entire perimeter of the patio. They act like a frame, locking the pavers in place and keeping them from creeping outward under pressure. A permeable pavers patio without edge restraints will eventually spread apart and develop ugly gaps.
The equipment you'll need will depend on your project's size. For a small, 100-square-foot patio, you might manage with a shovel, wheelbarrow, and a hand tamper. For anything bigger, renting the right tools is a smart move. A mini excavator can make short work of the digging, and a gas-powered plate compactor is vital for achieving the 95% compaction rate needed for a stable base. Spending a couple of hundred dollars on rental equipment is a far better investment than having to rebuild a failed patio in five years.
Installation Techniques That Deliver Professional Results
With a perfectly compacted foundation ready to go, you’ve reached the main event: laying the pavers. This is where your patience really pays off, turning a simple bed of stone into a stunning, functional patio. It’s more than just plopping down blocks; it’s about creating clean lines, sticking to your pattern, and making smart cuts for a truly professional finish on your permeable pavers patio.
Setting the Stage with String Lines and Starting Points
Your first move is to set up perfectly straight reference lines. Run string lines tightly between stakes along the edges of your patio area. Think of these lines as your unbreakable guide—they keep your paver courses straight and your pattern consistent. A tip I've learned is to set your string lines at the final height of the pavers, which accounts for their thickness above the bedding layer.
Where you start laying pavers is a strategic choice. I always recommend beginning along a fixed, straight edge, like the foundation of your house or an existing concrete sidewalk. This gives you a solid reference point and makes sure your new patio looks perfectly aligned with the rest of your property. When placing the pavers, set them gently onto the bedding course. Don't slide or twist them, as this will mess up the smooth surface you worked so hard to screed. Just work your way outward, placing pavers hand-tight against each other.
Mastering Joints and Patterns for Peak Performance
The gaps between the pavers, which we call joints, are essential to how a permeable system works. On a traditional patio, you'd fill these with sand to lock everything in. Here, they're intentionally filled with small, permeable aggregate. Keeping a consistent joint width, usually between ⅛ and ¼ inch, is key for both looks and proper water drainage. Luckily, many permeable pavers come with built-in spacer bars to make this part much easier.
This diagram shows a cross-section of a typical permeable paver system, illustrating how the paver, joint material, and base layers all work together.
This visual really drives home how the open-graded aggregate in the joints and the base creates a network of voids, letting water pass through without a problem. The success of your permeable pavers patio really depends on keeping these pathways clear from top to bottom.
Tackling Cuts, Curves, and Final Touches
Unless your patio is a perfect square, you're going to have to cut some pavers. This part can seem intimidating for first-timers, but it’s totally manageable. A diamond-bladed wet saw is your best friend here; it gives you clean, precise cuts with very little dust. Always measure twice and mark your paver clearly before you cut. For any curved edges, you'll make a series of small, angled cuts to create a smooth, flowing line.
Once all the pavers are in place, it's time for the final compaction and filling the joints. Here’s a quick rundown of how to finish strong:
- Initial Compaction: Run a plate compactor over the entire patio surface. This settles the pavers into the bedding layer, leveling them out and creating a tightly interlocked surface.
- Joint Filling: Generously sweep your chosen permeable aggregate (usually a ¼" clean chip stone) across the patio, working it into the joints until they are completely full.
- Final Compaction: Go over the patio with the plate compactor one last time. The vibration helps the aggregate settle deep into the joints, locking everything in place. You might need to sweep a little more aggregate into the joints after this final pass.
These installation methods share some ideas with other types of stonework. If you're drawn to a more rustic style, you might find our guide on installing a flagstone patio helpful. While the base materials are different, the core principles of a stable foundation and careful placement are universal.
Maintenance That Protects Your Investment
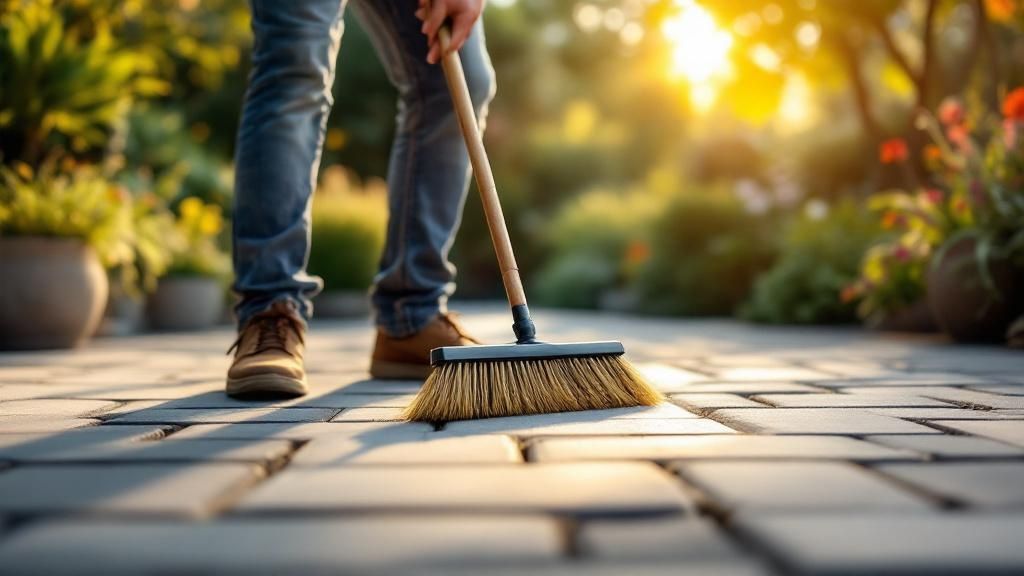
Your beautiful new patio is ready, and it's time to kick back and enjoy it. But like any other feature of your home, your permeable paver patio needs a little care to keep it working properly and looking great. The good news? The upkeep is straightforward and won't eat up your weekends. It's all about smart, seasonal routines that protect your investment for years to come.
Think of the tiny gaps between your pavers as the functional heart of your patio. For water to drain correctly, these gaps need to stay clear. The biggest culprit for clogs is organic debris like dirt, leaves, and grass clippings. If you start to see puddles forming after a normal rain, it’s a sure sign the joints are getting blocked. That’s your signal to do a little cleanup before it turns into a bigger headache.
A Year-Round Approach to Patio Care
The key to easy maintenance is staying ahead of the game. By tackling a few small tasks each season, you can prevent problems before they start and keep the work from piling up. A little regular attention is much easier than a full-scale restoration project later on.
Spring Awakening and Cleanup:
- Clear Winter Debris: Start the season with a good sweep to get rid of all the leaves, twigs, and general grime that built up over winter. This keeps that organic matter from breaking down and plugging the joints.
- Inspect for Shifting: The freeze-thaw cycles of winter can sometimes cause pavers to shift slightly. Walk around and look for any that aren't perfectly level with their neighbors. You can usually lift and reset a wobbly paver with a couple of paver-pulling tools and some extra bedding stone.
- Top Up the Joints: Peek at the aggregate in the joints. If it’s looking a bit low, just sweep some fresh ¼-inch stone into the gaps until it's flush with the paver surface again.
Summer Vigilance:
- Weed Watch: The same spaces that let water through can occasionally welcome a weed. It’s best to pull them by hand as soon as you spot them to stop their roots from getting established.
- Spot Cleaning: Drips from summer cookouts or gifts from visiting birds happen. Clean them up quickly with a stiff-bristled brush and some simple soap and water to keep stains from setting in.
Fall Preparation:
- Leaf Management: When the leaves start to fall, make a habit of clearing them off your patio with a leaf blower or rake. A thick mat of decaying leaves is the quickest way to clog the drainage gaps.
Winter Readiness:
- Safe De-icing: When your patio gets icy, never use standard rock salt or chemical de-icers. These products can eat away at the pavers and are bad for the environment. Instead, toss down a light layer of the same chip stone that’s in your paver joints. It provides great traction without harming your patio.
Troubleshooting and When to Call for Help
Most of the upkeep for a permeable paver patio is totally doable for the average homeowner. Regular sweeping, pulling the occasional weed, and spot cleaning are simple chores. Even resetting a single paver that has settled is a project you can likely handle yourself.
However, if you notice a large section of your patio has sunk or settled significantly, that might signal a deeper issue with the base underneath. This is when it's wise to call in a professional. A qualified contractor can figure out if the problem is from poor compaction or another foundational issue and recommend the right fix. For most people, though, a simple seasonal checklist is all you need to keep your patio working perfectly.
Optimizing Long-Term Performance And Value
Going beyond routine sweeping and pulling the occasional weed is how you truly get the most out of your investment in a permeable paver patio. It helps to think of your patio not just as a flat surface, but as a living, breathing water management system that you can fine-tune over time. This forward-thinking approach ensures it works beautifully for decades, not just a few seasons. You're shifting from simple upkeep to smart optimization.
One of the best things you can do is simply become an observer. After a heavy downpour, head outside and watch how your patio handles the rain. Does the water vanish almost instantly? Or are there a few spots where it seems to hang around a bit longer? These little observations are your real-world performance checks. If you notice drainage slowing down, it might be time for a deeper clean with a shop vacuum to gently lift fine sediment from the top layer of the joints. This technique can work wonders for restoring infiltration rates without a major overhaul.
Creating A Long-Term Care And Documentation Plan
To really protect your investment, it's a great idea to create a living document for your patio. This doesn't need to be anything formal—a simple notebook or a digital folder on your computer works perfectly. Here’s what you can track to keep everything in top shape:
- Log Your Maintenance: Jot down a quick note whenever you clean the patio, top up the joint aggregate, or make any repairs. This history is incredibly useful for spotting trends and is often required if you ever need to make a warranty claim.
- Take Annual Photos: Snap a few pictures of your patio from the same angles each year. This visual record makes it easy to spot subtle changes like a paver settling, joints widening, or colors fading over time.
- Document Materials: Keep a record of the paver brand and color, plus the type of aggregate used for both the base and the joints. You'll thank yourself later when you need to buy matching materials for a repair or an extension.
This kind of documentation also helps you know when it might be time to call in a professional. While you can handle most maintenance yourself, if you see widespread settling, it could point to a bigger issue with the base underneath. An expert can assess the situation and might suggest a targeted fix, saving you from a much more expensive full-scale replacement down the road. For anyone in the planning stages, tools for virtual staging for construction sites can offer a fantastic preview of how your finished patio will enhance your property's value and appeal.
Adapting Your Strategy For Climate And Use
Your maintenance plan shouldn't be set in stone. A patio in a rainy climate surrounded by trees will need more frequent sweeping to clear leaves and debris than one in an open, dry area. Likewise, a patio that gets a lot of foot traffic might need its joint aggregate topped off more often.
Adjust your schedule based on your patio’s specific environment and how you use it. By being proactive and observant, you can ensure your permeable patio is not only a beautiful addition to your home but also a hard-working environmental asset for your property. A thoughtfully designed and well-cared-for permeable patio is more than just an upgrade; it’s a commitment to quality and sustainability.
If you're ready to transform your outdoor space with a beautiful, functional solution, the team at Tamura Designs can help. With over 30 years of experience in creating custom landscapes, we bring craftsmanship and a personalized approach to every project.
Ready to start your project? Contact Tamura Designs today to discuss your vision.