Putting in a greywater system is a fantastic way to conserve water. At its core, it’s about redirecting used water from your laundry, showers, or bathroom sinks and putting it to work irrigating your landscape.
The process usually breaks down into three parts: planning the layout, picking the right materials, and connecting the plumbing from the source to your garden—often with a simple diverter valve. Many people get their feet wet with a basic laundry-to-landscape setup. It’s a great weekend project that won’t break the bank.
Why a Greywater System Is a Smart Home Upgrade

Before you even think about picking up a tool, it’s worth taking a moment to appreciate why this is one of the most impactful upgrades you can make to your home. The benefits go so much further than just "saving water." They create a ripple effect that improves your property, your community, and the local ecosystem. This isn't just another home improvement project; it's a solid step toward a more resilient and sustainable way of living.
The True Value of Reusing Water
Every time you reuse water, you’re not just trimming your utility bills. You're also lightening the load on municipal water treatment facilities. Think about it—those plants use a massive amount of energy to purify wastewater. By diverting your greywater, you help cut that energy demand and reduce the volume of treated water getting dumped into rivers and oceans.
This hands-on approach delivers some real, tangible benefits:
- Lower Utility Bills: When you cut back on fresh water, you’ll see it on your monthly bill. For many homes, landscape irrigation makes up nearly 50% of their total water use.
- Drought-Resistant Landscaping: Your garden gets a steady supply of moisture, even when the weather is dry or mandatory watering restrictions are in place. This helps create a much healthier, more robust landscape.
- Groundwater Recharge: Instead of sending all that water down the sewer, you’re letting it slowly soak back into the earth, helping to replenish local aquifers. It's even more effective when you pair it with other sustainable practices, like those covered in this guide on what are permeable pavers. Your yard can become a vital part of the local water cycle.
A greywater system transforms waste into a resource. You’re turning soapy water from your shower into life-giving irrigation for your fruit trees, turning a daily routine into an act of conservation.
A Growing Movement Toward Sustainability
Adopting this kind of technology puts you right at the forefront of a major environmental movement. The global greywater recycling system market is clear proof of this shift—it was valued at $1.48 billion and is expected to climb past $4.16 billion by 2032. This isn’t just a niche hobby; it’s a response to growing water scarcity and the availability of better, more accessible tech. You can dig into the market trends and what's driving them in this detailed research report.
When you're looking at a smart home upgrade like this, it’s also a good idea to see if there’s any funding available. Sometimes, checking out options like renewable energy grants can help with the initial cost of eco-friendly projects.
At the end of the day, understanding the immense value of this effort gives you the motivation to tackle the installation with confidence, knowing you’re making a positive and lasting change.
Designing Your DIY Greywater System
A good plan is everything. Before you even think about buying a single pipe, you need a solid design for your greywater system. This is the stage where you figure out the nitty-gritty: where the water will come from, where it’s going to go, and how it’ll get there.
Spending time on a thoughtful design now will save you from major headaches and costly fixes down the road. It’s your roadmap to a system that’s not just effective, but also safe and up to code.
Start with a Solid Site Assessment
First things first: get outside and walk your property. You need to get a feel for the lay of the land and how your home's plumbing is set up. Look for the path of least resistance. Where does water naturally want to flow? What’s the easiest route from an indoor drain to an outdoor garden bed?
Your next job is to pinpoint the best sources of greywater. The most common (and easiest) ones are:
- Washing Machine: This is the gold standard for a first-time DIY system. It produces a good amount of water on a regular schedule, and the drain is often easy to access.
- Showers and Bathtubs: These are high-volume sources, but be warned—tapping into the plumbing can be tricky if you're not comfortable opening up walls or floors.
- Bathroom Sinks: A smaller but steady source of water, perfect for watering a few plants right outside the bathroom window.
A quick word of caution: steer clear of kitchen sinks and dishwashers. The water from these sources is loaded with grease, food scraps, and harsh detergents that can clog your system and seriously harm your soil. Stick with laundry and bath water for a simple, healthy setup.
Once you’ve picked your source, find the ideal spots in your yard to send the water. You're looking for areas that are downhill from the source so gravity can do all the work for you. Fruit trees, garden beds, and thirsty shrubs are all great candidates.
For most beginners, a laundry-to-landscape system is the perfect starting point. The washing machine is typically against an exterior wall, making it a piece of cake to divert the drain line outside to a thirsty grove of fruit trees or a flower bed.
Get Your System Sizing Right
Okay, now let's talk volume. You need a rough idea of how much greywater your home actually produces. If you build a system that’s too big for your output, you’ll end up with a soggy, waterlogged mess. Too small, and your plants will still be thirsty.
Don’t worry, the math is pretty simple. The biggest contributors are your shower and your washing machine. A standard washing machine pumps out anywhere from 15-30 gallons per load. A quick 10-minute shower can easily use 20 gallons.
Just multiply those numbers by the people in your house and their weekly habits. A family of four running five loads of laundry a week? That’s potentially 150 gallons of free, reusable water. Knowing these numbers helps you figure out exactly how many plants your new system can realistically support.
Before you dive into the specifics of system types, it helps to see them side-by-side. Every home and landscape is different, so what works for your neighbor might not be the best fit for you.
Choosing Your Greywater System Type
| System Type | Best For | Installation Complexity | Typical Cost Range |
|---|---|---|---|
| Laundry-to-Landscape | Beginners, homes with easy washer access, irrigating trees and large shrubs. | Low (often DIY) | $100 – $400 |
| Branched Drain | Sloped properties, irrigating multiple zones, whole-house systems. | Medium to High | $500 – $2,500+ |
| Pumped System | Flat or uphill properties, gardens far from the source. | High (often pro install) | $1,500 – $5,000+ |
| Surge Tank | Large-volume sources like bathtubs, evening out water flow to the garden. | Medium | $300 – $1,000 |
This table should give you a clearer picture of your options. For most people, the simplicity and low cost of a Laundry-to-Landscape system make it the obvious choice for a first project.
Navigating Building Codes and Permits
I know, I know—this is the part everyone wants to skip. But trust me, dealing with local codes and permits is non-negotiable. Greywater rules can vary wildly from one town to the next. Some places are totally on board with simple systems and don't require a permit, while others have strict regulations that demand detailed plans and official inspections.
Your first step is a call to your local building or health department. They’re not there to make your life difficult; they just want to make sure things are done safely. Be prepared with a few key questions:
- "Do you have any permit exemptions for simple greywater systems, like a laundry-to-landscape setup?"
- "What are the setback requirements? How far does the system need to be from property lines, the house foundation, or any wells?"
- "Are there specific materials, like certain types of pipes or valves, that I need to use?"
- "Is a backflow prevention device required for my system?"
Getting clear answers upfront will save you a world of trouble later on. It’s the difference between a project you can be proud of for years and one that becomes a costly violation. A little bit of research now ensures your answer to "how to install a greywater system" is one that’s not just smart, but also 100% legal.
Assembling Your Tools and Materials
There’s nothing worse than getting halfway through a project only to realize you’re missing a critical part. A chaotic trip to the hardware store is a classic DIY pitfall. To make your greywater installation go smoothly, let's get everything organized first.
Think of it like prepping your ingredients before you start cooking. Having all your tools and materials laid out and ready to go turns a potentially frustrating job into a satisfying one. We'll walk through exactly what you'll need, from the pipes that form the system’s backbone to the irrigation gear that feeds your garden.
The Plumbing Heart of the System
This is where you don't want to cut corners. The plumbing components are the core of your greywater system, silently doing their job of redirecting water from your home to your landscape. Quality here is key for a system that will last for years without headaches.
Here’s your shopping list for the essential plumbing bits:
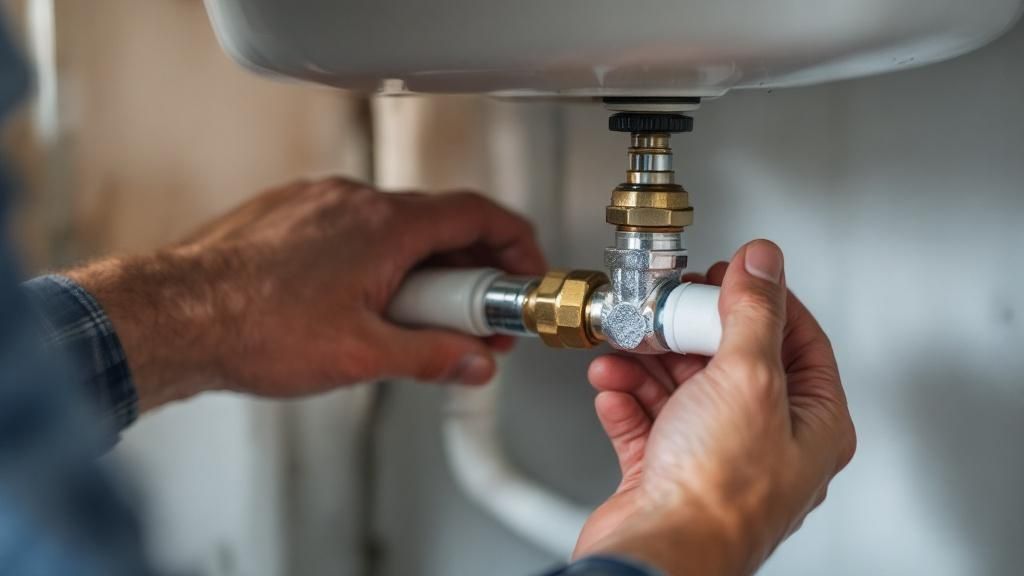
- 3-Way Diverter Valve: This is the most important piece of the puzzle. It’s what lets you flip the water flow between your sewer or septic and your new irrigation lines. I always tell people to get a valve with a non-corrosive ball—think brass or stainless steel—so it doesn’t seize up after a few years.
- ABS or PVC Pipe: For a simple, gravity-fed laundry-to-landscape setup, a 1-inch to 1.5-inch diameter pipe is usually perfect. The black ABS pipe is my go-to for its durability, but always double-check your local codes to see if they prefer one over the other.
- Fittings and Adapters: You'll need a good mix of elbows (both 45° and 90°), couplings, and various adapters to snake around corners and connect everything up. Trust me on this: buy a few more than you think you need. It's a small price to pay to avoid a last-minute trip to the store.
- Pipe Cement and Primer: Seriously, don't skip the primer. It's the step that cleans and preps the pipe, allowing the cement to create a truly permanent, leak-proof weld.
Here's a pro tip I've learned from experience: Whenever you can, use two 45° fittings to make a gentle, sweeping turn instead of one sharp 90° elbow. This one small change dramatically improves water flow and makes it much harder for lint and debris to build up and cause a clog down the line.
It's no surprise these systems are getting more popular. The global greywater market is already valued at around $2.5 billion and is poised for major growth. This isn't just a niche hobby anymore; it's a practical response to water scarcity, made easier by modern designs. You can find more insights on this expanding market and its future trends.
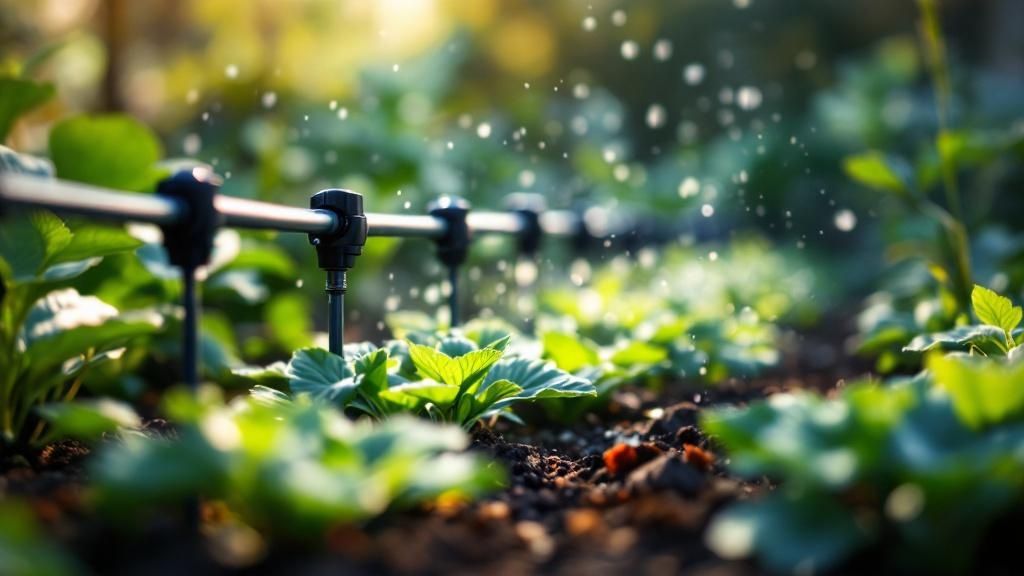
Getting Water to Your Garden
Once the greywater is outside, the goal is to distribute it effectively without creating puddles or runoff. We want that water sinking deep into the soil right where the plant roots can find it.
For the landscaping side of things, you’ll need:
- Woody Mulch: A nice, thick layer (6-8 inches) of coarse mulch is your best friend here. It acts as a fantastic natural filter, spreads the water out, and gives it time to soak gently into the ground.
- Shovel and Digging Bar: You'll need these for the satisfying work of digging out the mulch basins that will cradle the water around your trees and plants.
- Emitters or Outlets: In many simple laundry systems, the outlet is just the end of the pipe buried inside the mulch basin. If you want something more formal, you can find specialty greywater emitters built to handle unfiltered water.
The Right Tools for the Job
You don’t need a full-blown workshop, but the right tools make every step safer, faster, and more precise. Having these ready to go is the final piece of preparation.
Before you cut a single pipe, make sure you have these on hand:
| Tool | Why You Need It |
|---|---|
| Pipe Cutter | Gives you clean, square cuts every time. This is essential for getting perfect, leak-free joints. |
| Tape Measure | For getting those pipe lengths and slope measurements just right. No guesswork allowed! |
| Level | Absolutely critical for ensuring your pipes have the required 1/4-inch drop per foot to keep water flowing with gravity. |
| Drill with Hole Saw | The cleanest way to make a hole through a wall or floor to run your pipe outside. |
| Caulk and Sealant | For properly weatherproofing any holes you make in your home's exterior. |
With your parts gathered and your tools lined up, you're officially ready to stop planning and start building.
Your Greywater System Installation Guide
Alright, you’ve got your design finalized and your materials laid out. Now comes the best part: the installation. This is where your planning turns into a real, working system that saves water and nourishes your garden.
We're going to focus on the most popular DIY project out there—the laundry-to-landscape system. Why? Because it delivers the biggest bang for your buck with the least amount of complexity.
Think of this as your hands-on guide. I'll walk you through everything, from installing that critical diverter valve to sculpting the perfect mulch basins that will feed your thirsty plants.
This simple graphic breaks down the core process for a typical laundry-to-landscape setup.
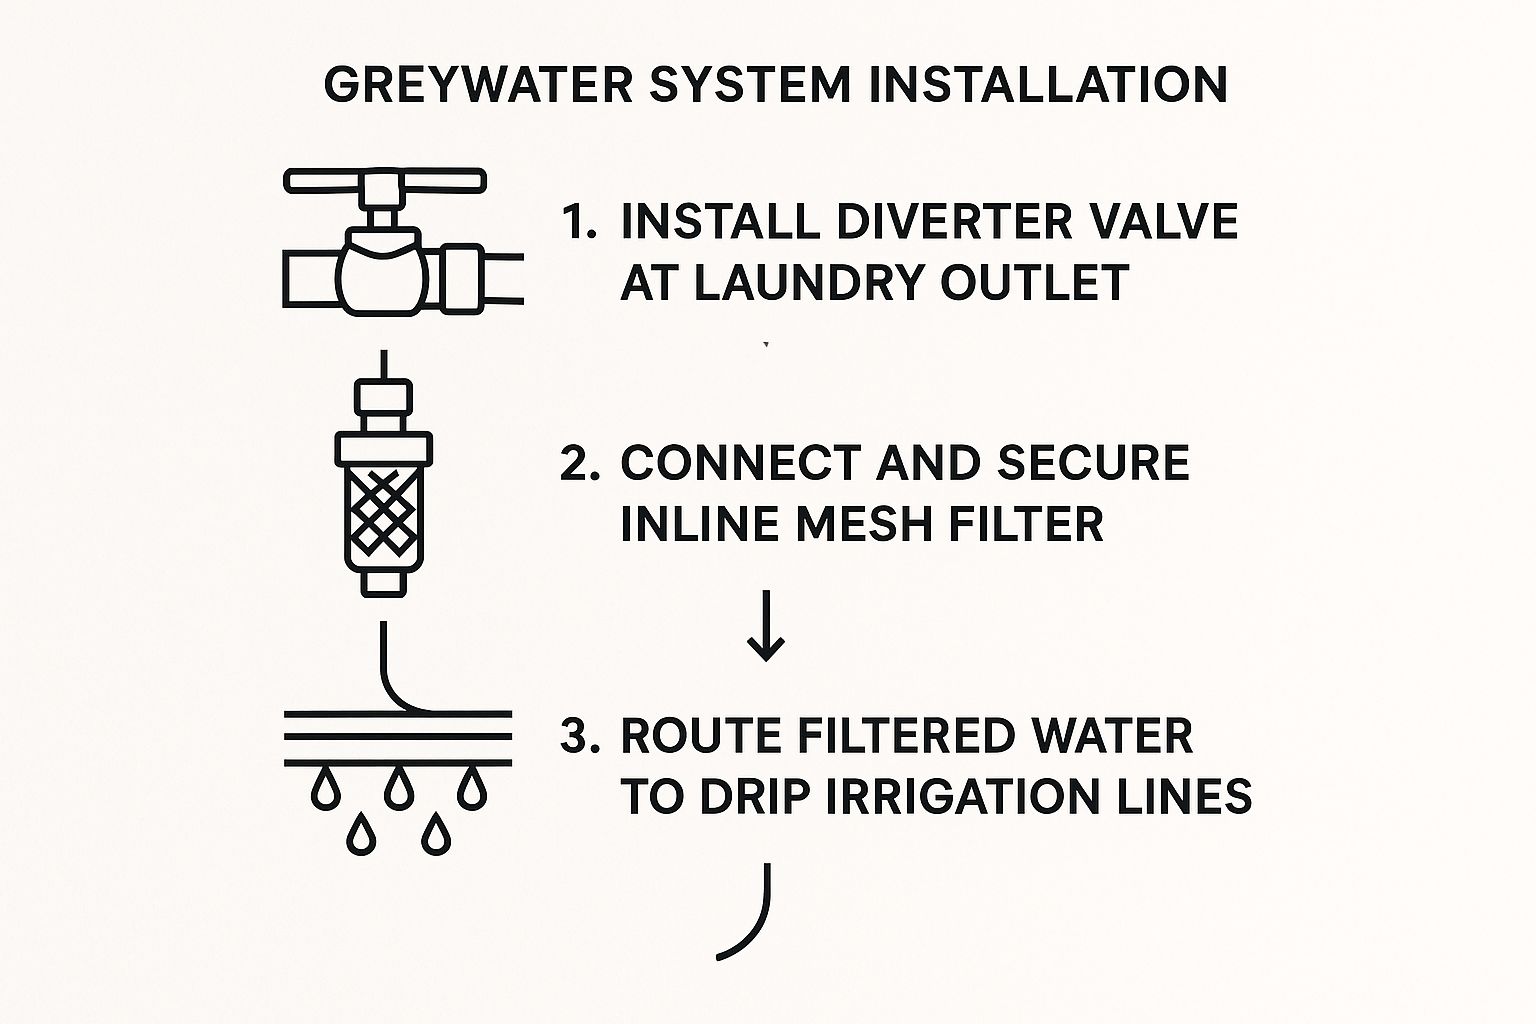
As you can see, it really boils down to three things: diverting the water, filtering out lint, and then routing it to your garden. It’s a beautifully simple path from waste to resource.
Installing the Three-Way Diverter Valve
The three-way diverter valve is the heart of your entire system. It’s the simple switch that puts you in control, letting you send laundry water either to the sewer like normal or out to your landscape.
This flexibility is non-negotiable. You’ll need it during winter freezes, when you're using bleach or harsh chemicals, or if you're washing something exceptionally dirty (like cloth diapers).
First, find your washing machine’s drain standpipe—that's the vertical pipe the machine’s drain hose empties into. You're going to need to cut into this pipe to install the valve. The old rule holds true: measure twice, cut once. A clean, square cut from a dedicated pipe cutter is your best bet for a leak-proof seal down the line.
With a section of the standpipe removed, it's time to fit the valve. Apply your PVC or ABS primer to the pipe ends and the inside of the valve fittings, then follow it with the cement. Push the pieces together with a slight twist and hold them firmly for about 30 seconds. This creates a strong, permanent bond.
A Critical Installation Tip: When you position the diverter valve, make sure the handle is easy to get to. You don't want to be fumbling behind a rumbling washing machine. Also, ensure the handle clearly shows which way the water is flowing—one direction for the sewer, the other for your landscape.
Routing the Plumbing Outside
With the valve securely in place, the next job is running the new pipe from the valve's "landscape" outlet to the outside of your house. The number one rule here is simple: gravity is your best friend. For water to flow freely without a pump, you have to maintain a consistent downward slope.
The standard is a minimum drop of 1/4-inch for every foot of horizontal pipe. Get your level out and check this meticulously as you work. Any flat or uphill section will cause water to pool, and that’s a recipe for a smelly, clogged mess.
How you route the pipe will depend on your home's layout.
- Through a Crawlspace: This is usually the cleanest option, as it keeps the pipes completely hidden.
- Along an Exterior Wall: If you don’t have a crawlspace, you can run the pipe along the outside of your house, securing it neatly with pipe straps.
- Directly Through the Wall: Is your washer already on an exterior wall? Perfect. You can drill a hole directly behind the machine for the shortest path possible.
If you’re drilling through an exterior wall, use a hole saw that’s just a little bigger than your pipe's outer diameter. Once the pipe is through, be sure to seal the gap around it completely with an exterior-grade caulk. This is a crucial step to keep pests, rain, and cold air out.
Creating Effective Mulch Basins
Your greywater's final destination isn't the surface of your garden; it’s the root zone of your plants. Just letting the pipe dump water onto the ground creates runoff and pooling, which is inefficient and can be a health hazard. The solution? Mulch basins.
A mulch basin is basically a shallow, wide trench filled with coarse wood chips. It functions like a mini-wetland, slowing the water, filtering out leftover lint, and letting it soak slowly and deeply into the soil where it’s needed most.
For a fruit tree, you would dig a basin about 6-8 inches deep in a donut shape around its drip line (the area right under the outermost leaves). Never place it right against the trunk—that can encourage root rot.
Fill the basin with a thick layer of woody mulch. The end of your greywater pipe should sit inside the basin, buried under an inch or two of mulch to keep it out of sight and prevent any odors or pests. The mulch also shields the water from the sun, minimizing evaporation and making sure every drop counts.
Connecting It All and Testing the System
Once your main pipe reaches the garden, you can easily split the flow to multiple basins using simple "tee" fittings. This lets a single load of laundry water several different plants. Just remember to maintain that gentle downward slope for every single branch of the system.
Getting the drainage right across your whole yard is key. For a deeper dive, you might want to explore some broader principles of backyard drainage solutions that can really complement a new greywater installation.
With every pipe and fitting connected, it’s time for the moment of truth. Flip your diverter valve to the "landscape" position and run a small, rinse-only cycle on your washing machine.
Now, head outside and watch your handiwork in action. Keep an eye out for:
- Leaks: Check every single joint and fitting, from the valve all the way to the garden.
- Flow: Is water moving freely out of each outlet?
- Distribution: Are the mulch basins soaking up the water without overflowing?
Make any small adjustments you need. Maybe a basin needs more mulch, a pipe’s slope needs a slight tweak, or a fitting needs to be tightened. Once you’re confident it’s all working perfectly, go ahead and run a full load. You’ve earned it.
Keeping Your System Running Smoothly for Years to Come
Congratulations! Your greywater system is in the ground and giving your landscape that precious water. But getting it installed is just the first step. The real magic comes from a little bit of simple, consistent upkeep that ensures your system runs efficiently and your garden stays healthy for the long haul.
Think of it less like a chore and more like the final, rewarding piece of the puzzle. A few easy habits are all it takes to prevent clogs, protect your plants, and maximize those water savings.
A Simple Maintenance Routine You’ll Actually Follow
The great news is that a well-designed, gravity-fed system is remarkably low-maintenance. You won’t be spending your weekends tinkering with pipes. Instead, a few quick checks on a regular schedule are all you need.
Here’s a practical timeline I give my clients:
- Weekly Peek (for the first month): While the system is running, just take a quick walk around your mulch basins. You're looking to make sure water is spreading out nicely, not pooling in one spot or running off.
- Monthly Lint Check: This one's easy. Just clean your washing machine’s lint filter. A clean filter is your first line of defense against lint building up in the system and causing blockages.
- Quarterly Walk-Through: A few times a year, check that the diverter valve moves freely between the sewer and landscape settings. You’ll also want to top up the mulch in your basins, as it naturally breaks down and settles over time.
This proactive approach is all about catching small issues before they become real problems. It’s what keeps the whole setup working smoothly, season after season.
The Dos and Don'ts for a Healthy Greywater Garden
This is probably the most critical part of long-term success. The water you send to your plants is only as good as what goes down your drains. Using the wrong products can slowly harm your plants and even damage the soil itself over time.
Stick to these guidelines, and your garden ecosystem will thank you.
What to Do:
- Use Plant-Friendly Soaps: Always choose biodegradable, low-sodium soaps and detergents. Look for products specifically labeled "plant-safe" or "greywater-friendly."
- Give Them a Fresh Drink: After a good rain, or even just every once in a while, it's smart to give your plants a good soaking with fresh water. This helps flush away any salts that might have built up in the soil.
- Water the Roots, Not the Leaves: Your system should always be designed to deliver water straight to the soil and mulch, never onto the leaves or the parts of your vegetables you plan to eat.
What to Avoid:
- No Bleach or Boron: Chlorine bleach is flat-out toxic to plants. Boron, which shows up in many "natural" detergents, can also build up in the soil to toxic levels. Avoid them both.
- Ditch the Fabric Softeners: These products are often loaded with chemicals that can clog up the tiny pores in your soil and harm the beneficial microbes living there.
- Watch Out for "Water Softening" Salts: If your home has a water softener that uses sodium, make sure it doesn't empty into your greywater lines. High salt levels are a death sentence for most plants.
Adopting these habits is about more than just maintaining pipes; it's about nurturing a living system. The choices you make at the washing machine directly impact the vitality of your garden, creating a direct link between your home and your landscape.
Beyond the immediate boost to your garden, these efforts are part of a larger trend in creating beautiful and resilient outdoor spaces. For more inspiration on how to build a landscape that’s both stunning and smart, check out our guide on sustainable landscape design.
Answering Your Top Greywater Questions
Even with a detailed guide, you're bound to have questions as you start your project. That's a good thing. Asking the right questions is the best way to make sure your system is safe, effective, and built to last. Let's walk through some of the most common ones we hear from homeowners.
Is This Even Legal Where I Live?
This is always the first question, and for good reason—the answer changes everywhere you go. Legality really depends on your local building and health codes.
Many places are now perfectly fine with simple, non-pressurized "laundry-to-landscape" systems and don't require a permit, as long as you follow some basic safety guidelines.
But the moment you plan to alter your home's plumbing, like cutting into a shower drain, you'll almost certainly need a permit and an official inspection. Your very first call should be to your local building or health department. They'll give you the exact rules you need to follow.
Can I Use Water From My Kitchen Sink?
I get this one a lot, but the answer is a hard no. It's strongly recommended you avoid using water from your kitchen sink or dishwasher. In fact, most plumbing codes don't even classify this as greywater; they call it "blackwater."
Why? Kitchen water is full of grease, fats, oils, and small food scraps. All that organic matter is a recipe for disaster in a greywater system. It will quickly:
- Clog up your pipes and irrigation lines.
- Create some seriously unpleasant odors as it decomposes.
- Attract pests you don't want in your garden.
- Damage your soil's health over the long run.
For a simple, low-maintenance DIY system that works, stick to the good stuff: washing machines, showers, and bathroom sinks.
What Kind of Soaps Are Safe to Use?
This is a critical detail for the health of your garden. Everything you put down the drain will end up in your soil, feeding your plants. You have to choose biodegradable, plant-friendly products.
When you're at the store, check the labels for a few key things. Make sure the product is:
- Low in sodium (salt): Salts build up in the soil and can kill your plants.
- Free of boron: Even in small amounts, boron is toxic to many common garden plants.
- Free of chlorine bleach: Bleach is designed to kill living things, and it will wipe out the beneficial microbes that keep your soil healthy.
Thankfully, many eco-conscious brands now create soaps and detergents specifically for greywater systems, so finding the right products is easier than ever.
Here's a simple rule to remember: if it wouldn't be good for your plants to pour on them directly, don't put it in a drain that leads to them. A little bit of mindfulness when you shop makes all the difference.
Do I Really Need a Filter?
For a basic laundry-to-landscape setup, the lint trap that's already in your washing machine is usually more than enough to catch stray fibers. The whole point of these simple systems is to avoid adding complex parts that need constant cleaning.
If you're building a slightly more advanced system that captures shower water, you could add a simple mesh filter to catch hair before it gets into your irrigation lines. But for most DIY projects, a fancy filter system is just an unnecessary complication.
At Tamura Designs, we believe in creating beautiful, sustainable outdoor spaces that work in harmony with nature. If you're ready to take your landscape to the next level with a professionally designed and installed system, we're here to help.
Explore our award-winning services and see how we can transform your vision into reality at https://tamuradesigns.com.