Laying pavers over an old concrete patio might seem like a smart shortcut. It feels like you’re getting a head start by using a base that's already there. But this "shortcut" almost always creates bigger, more expensive problems later on.
The main issues are poor drainage, a stiff base, and the condition of the old concrete. This method traps water between the pavers and the concrete. It also means any cracks in the old concrete will show up on your new paver surface.
Why Laying Pavers on Concrete Is a Risky Shortcut
It's easy to see why people try it. You look at your old, cracked concrete patio and think, "The foundation is already there!" It seems like a great way to save time, money, and hard work.
But this method ignores how a paver system is supposed to work. Pavers aren't meant to be glued to a solid surface. They are made to be part of a flexible system that sits on a bed of packed gravel and sand. This proper base allows for drainage and small movements.
Think of a proper paver base like the suspension on a truck. It’s built to absorb bumps and flex with changing conditions without breaking. Now, imagine replacing that suspension with a solid block of steel. That's your concrete slab. It’s stiff and doesn't give. It transfers every jolt straight up to the pavers. This is where all the trouble begins.
The Main Problem: Flexible Pavers vs. a Stiff Base
The problem is a battle between how pavers are meant to work and how concrete actually works. A professionally installed paver system is built to last because it can adapt.
- A Flexible Base: The normal gravel and sand base lets pavers shift a tiny bit as the ground freezes and thaws. This flexibility stops the system from cracking under pressure.
- A Clear Path for Water: Rainwater is meant to flow down through the cracks between the pavers and drain away through the gravel base. This keeps the surface dry and stable.
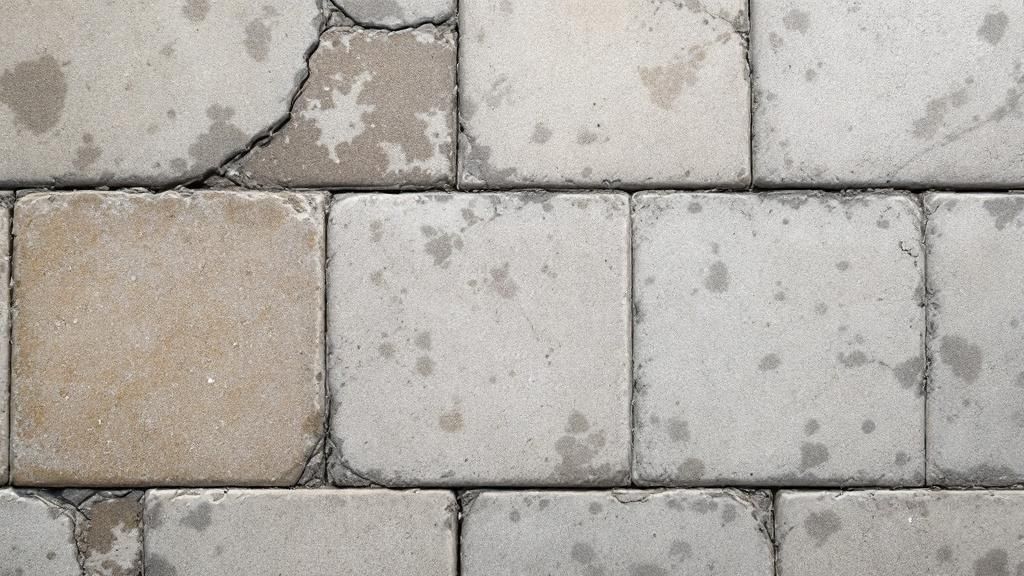
- An Unforgiving Slab: Concrete does the opposite. It's completely stiff. Any crack or shift in that slab will eventually show up on the paver surface above. This creates new cracks, uneven spots, and tripping dangers.
A gravel base will move a little… Cement is stiff—if you put a stiff top on a flexible base then cracking is bound to happen.
This is why experienced builders will tell you, again and again, that the old concrete has to go. Starting with a proper foundation is the only way to make sure your new paver patio or walkway stays level, safe, and beautiful for years. Trying to skip that step is just not worth the risk.
Let's look at the common problems you'll likely face if you try to install pavers over an old slab.
Common Issues with Paver Overlays
Here’s a quick list of what can—and often does—go wrong when you take this shortcut. This table shows how a bad foundation leads to more problems.
| Problem Area | Cause | Likely Outcome |
|---|---|---|
| Poor Drainage | Water gets trapped between the pavers and the concrete slab. | Mold, white stains, and pavers that move out of place. |
| Cracks | Old cracks in the concrete transfer up through the paver base. | Pavers crack or become uneven, creating a trip hazard. |
| Uneven Surface | The concrete slab moves due to frost or shifting soil. | Wobbly, unsafe pavers and a lumpy, ugly surface. |
| Limited Height | The extra height of pavers can block doors. | Doors that won't open and water draining toward the house. |
As you can see, these are not small problems. They are major issues that affect the safety, look, and life of your entire project.
How a Stiff Concrete Base Causes Pavers to Fail
Think about building something flexible on a foundation that's already cracked and can't move. That's exactly what happens when you lay pavers over old concrete. Pavers are designed to be a flexible system. They are meant to shift a little with the ground as the weather changes. A proper gravel and sand base allows for this natural movement.
A concrete slab, on the other hand, is completely stiff. This is where the trouble starts. We're going to break down why flexible pavers and a stiff concrete base are a terrible mix. It all comes down to how the concrete’s stiffness puts too much stress on the pavers, leading to cracks and an uneven, dangerous surface.
It's like trying to keep a jigsaw puzzle together on a wobbly table. If the table moves even a little, the puzzle pieces pop out. Any movement or crack in the concrete below will show up on your paver surface, creating an ugly problem and a serious trip hazard.
The Problem with Strength and Flexibility
This might sound a little strange, but pavers are often much stronger than the concrete they're sitting on. Most concrete slabs can handle pressure of about 3,500 to 4,000 PSI. Pavers can often handle 8,000 to 12,000 PSI.
But here’s the problem: that strength is meant to work as part of a flexible, interlocking system. The stiff concrete below cancels out that benefit. It stops the pavers from moving on their own or adjusting to freeze-thaw cycles. This stiffness is the reason why most paver-over-concrete jobs fail. The slab transfers all the stress directly to the pavers.
When you place a stiff top (pavers) on a flexible base (like gravel and sand), it works great. But when you place a flexible system on a stiff and cracked base (concrete), it is almost sure to fail.
This setup stops the pavers from settling naturally. Instead, it forces them to take all the pressure from the shifting, cracking slab below.
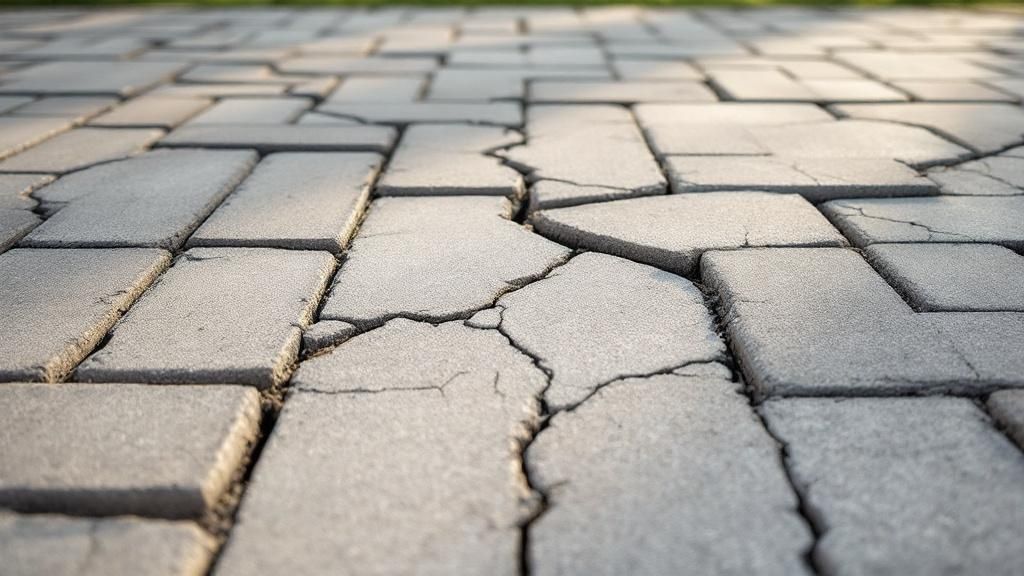
How Cracks Move Up to the Surface
One of the most common problems we see is called "reflective cracking." It's a simple but damaging process. Any crack in the concrete slab will eventually move upward and appear on your paver surface.
Here's how it happens:
- The Concrete Cracks: Over time, all concrete slabs get cracks. It's just what concrete does as it settles or changes with the temperature.
- Movement Happens: The cracked parts of the concrete begin to move separately. This creates a tiny, uneven edge right under your sand bed.
- Pavers Get Stressed: The pavers sitting right over that crack are now not supported on one side and are being pushed up on the other. This creates a single point of intense stress.
- The Surface Fails: Over time, the pavers will either crack under the pressure or move out of place. This creates that ugly and dangerous trip hazard.
This process is almost impossible to avoid. No amount of sand can stop a powerful, shifting concrete slab from ruining the paver surface above it. This is why a proper base is so important for a long-lasting paver project. To learn more about how a proper base helps, check out our guide on what permeable pavers are.
Understanding the Key Role of Drainage
When pavers are installed over a concrete slab, water is the main enemy. In a normal paver installation, rainwater has a way to escape. It drips down through the joints, filters through the sand and gravel, and soaks into the ground.
But a concrete slab creates a solid, waterproof barrier. It blocks that natural drainage path. This is one of the biggest problems with pavers over concrete. It traps water right under your new patio, with nowhere to go.
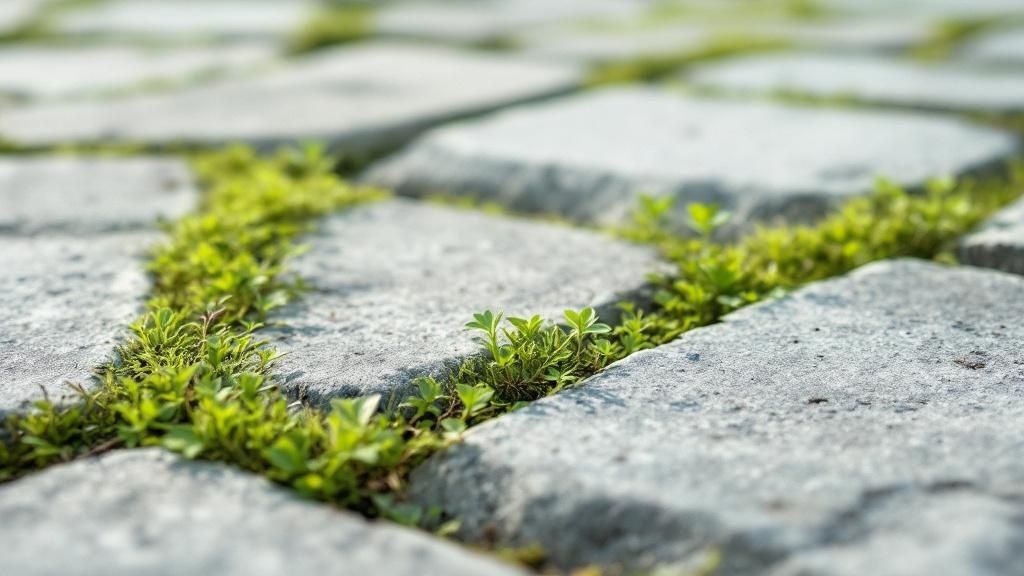
This trapped water creates a damp space, which is perfect for all sorts of trouble. Think of it like a damp basement—it’s the perfect place for mold, mildew, and moss to grow in your paver joints. Weeds also love these conditions, so you'll see them pop up more often.
The Damaging Power of Freeze-Thaw Cycles
If you live in a colder area, that trapped water becomes a major problem. When the water caught between the pavers and the concrete freezes, it expands with great power. This is called frost heave. It will push your pavers upward, turning a flat surface into a lumpy, dangerous mess.
This cycle repeats every winter. The ice pushes the pavers up. When it melts, they settle back down, but never in the exact same spot. Over time, this constant movement loosens the pavers and makes the whole area unstable.
Trapped water is the main cause of most paver failures on concrete. It ruins the sand bed, helps things grow, and uses the power of ice to take your patio apart from below.
The damage from bad drainage doesn't stop there. The constant moisture also washes away the sand bed that your pavers sit on. This causes pavers to sink, shift, and wobble. For homeowners already dealing with this, looking into better drainage is important. You might find some helpful ideas in our guide on 8 effective patio drainage solutions for 2025.
Why Concrete Is a No-Drainage System
Unlike soil or a proper gravel base, concrete slabs are almost completely waterproof. They block any water from reaching the ground below. This makes freeze-thaw cycles much more damaging in cold areas. To give you an idea, studies show that special permeable pavements can handle water draining at a rate of 1 inch to over 1,500 inches per hour. A solid concrete slab? Its drainage rate is zero. You can get more details on permeable pavement performance from the EPA.
The Hidden Costs of Paver Repairs
The money you think you’re saving by laying pavers over old concrete can disappear quickly when expensive repairs are needed. This is one of the most annoying problems with pavers over concrete.
Fixing a few pavers on a proper base is an easy job. But fixing them when they're on concrete is much harder. It's a huge headache.
When pavers on concrete start to crack or shift, the real problem is almost always the slab underneath. You can't just lift a wobbly paver and add more sand to level it. The repair usually means fixing the concrete itself, which is a much bigger and more expensive job.
This creates a cycle of problems. Any cracks in the concrete will only get worse. They will transfer the same problems up to your pavers again and again. You end up fixing the same spots over and over, which would never happen if the base was done right.
The True Price of a Shortcut
At first, fixing a few pavers seems easy. But when they’re sitting on concrete, any movement in the slab transfers directly to the pavers. You’ll find yourself re-leveling them all the time.
The money you saved at the start is often wiped out by higher repair bills later. Fixing both the pavers and the damaged slab below can cost hundreds or even thousands of dollars for a single problem.
A simple paver repair on a proper base might take a few minutes. A similar repair over concrete could mean cutting out parts of the slab. That’s a major construction project, not a quick fix.
This can be a big shock for homeowners who chose the overlay method to save money. What seemed like a smart choice quickly becomes a repeat expense that never actually solves the main problem.
Why Repairs Are So Hard
Fixing pavers on concrete is not easy. The job gets complicated by a few things that don't happen with a normal gravel and sand base.
- Glued Materials: Often, the pavers are glued to the concrete with a strong adhesive. This makes it almost impossible to remove a single paver without breaking it and the ones next to it.
- Fixing the Slab: If a crack in the concrete is causing the problem, you can't fix it from above. The pavers have to be removed to get to the slab, which is a huge job.
- Drainage Problems: Even if you fix a section, you can easily create new drainage problems. This leads to more trapped water, more damage, and the whole bad cycle repeating itself.
To avoid these problems and save money later, it's worth looking into bigger pavement preservation strategies. Building a surface that lasts from the ground up is always the cheapest solution in the long run. It saves you from the hidden costs of a risky shortcut.
The Right Way: Removing Concrete for a Lasting Fix
So, you’ve seen all the ways a paver-over-concrete job can go wrong. It’s clear that taking shortcuts now just leads to major problems later. If you want a paver patio or driveway that looks great and lasts for years, the only real solution is to do the job right from the start. That means getting rid of the old concrete and building a proper foundation from scratch.
A proper installation isn't just about laying stones. It's about creating a flexible system that can handle anything nature throws at it, like rain, frost, and heavy weight. It’s a process with several key steps, and every single one is important. If you skip one, you’ll end up back where you started, dealing with bad drainage and an unstable surface.
Take a look at this comparison. It shows the long-term difference between installing pavers over concrete and doing it the standard way.
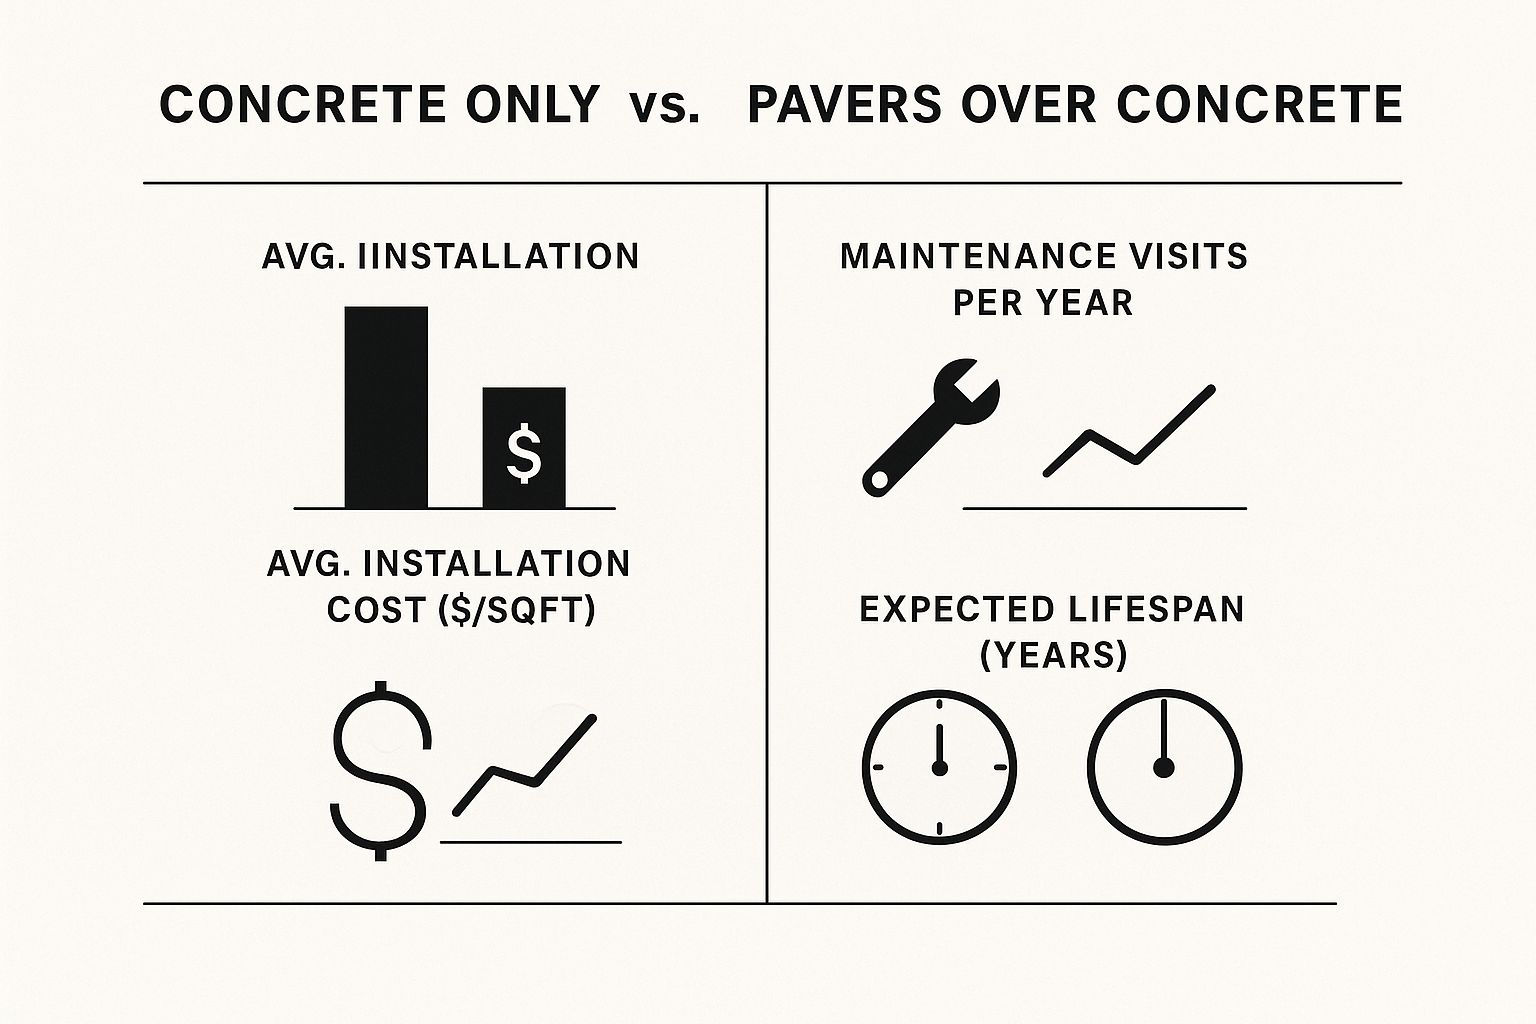
As you can see, the money you save at the beginning gets used up quickly by constant repairs and a much shorter lifespan.
The Professional Method: A Step-by-Step Guide
The standard way—the one professionals use—starts with tearing out that old concrete slab. There’s no way around it. This is the only way to build a foundation that gives your pavers the two things they need most: solid stability and great drainage. It’s more work up front, but it saves you from endless, annoying repairs in the future.
Here’s how the pros do it:
- Digging Out: First, the old concrete has to go. It’s broken up and taken away. Then, the area is dug out about 6 to 8 inches deep to make room for the new base.
- Packing the Ground: The soil at the bottom is sloped slightly (to direct water away from the house) and then packed down until it’s very firm. This is your starting point, and it needs to be perfect.
- Laying a Gravel Base: Next, a layer of gravel, usually 4 to 6 inches deep, is added. This is done in smaller layers, with each layer packed down tightly. This creates a super strong, stable base that also lets water drain through.
- Adding a Sand Bed: A 1-inch layer of coarse sand is spread evenly over the packed gravel. The pavers will sit in this sand bed, and it allows for small adjustments to get everything perfectly level.
- Placing the Pavers: Now for the fun part. Pavers are laid in the pattern you chose. Once they’re all in place, a machine called a compactor is run over them to set them firmly into the sand.
- Filling the Joints: Finally, special sand called polymeric sand is swept into all the joints between the pavers. A light spray of water makes it harden like grout. This locks everything together, keeps weeds out, and stops the sand from washing away.
This layered system is designed to work together perfectly. The gravel gives a solid, draining base, while the sand bed lets the pavers lock together and flex just enough to avoid cracking. It’s a proven formula for success.
To get a better idea of how these two methods compare, let's put them side-by-side.
Comparing Paver Installation Methods
| Installation Step | Standard Method (Recommended) | Over Concrete Method (High Risk) |
|---|---|---|
| Site Preparation | Remove old concrete, dig down 6-8 inches. | Leave concrete in place. |
| Base Foundation | 4-6 inches of packed gravel for drainage & stability. | Relies on the old, cracked concrete slab. |
| Drainage | Water flows through joints and gravel base. | Needs dozens of drilled holes; often not enough. |
| Setting Bed | 1-inch sand bed lets pavers interlock and flex. | Thin layer of sand on concrete offers no flex. |
| Long-Term Stability | Flexible system adjusts to ground movement. | Stiff slab cracks and moves, damaging pavers. |
| Lifespan | 25+ years with very little maintenance. | 5-10 years, often with ongoing problems. |
The table really tells the story. One method is built to last, while the other is a risk from the start.
The High-Risk Alternative: Installing Over Concrete
Okay, what if removing the concrete is just not possible? There are a few "band-aid" fixes you can try to lower the risk, but they are not guaranteed to work. This method involves drilling many drainage holes—at least one 2-inch hole per square foot—through the concrete slab to give water a way to escape.
After that, a special drainage mat is usually laid down to create a small air gap. But even with all that extra work, you’re still relying on the old slab. Any cracks underneath will eventually show up through your new pavers. This method is a risky compromise that rarely solves the core problems with pavers over concrete. Looking at some of the beautiful landscape ideas with pavers that are possible with a proper installation will show you why it’s always worth doing it right.
Common Questions About Laying Pavers on Concrete
Even with a plan, it’s smart to have questions before starting a big project. When it comes to laying pavers, we hear the same ones over and over—especially about the risky shortcut of putting them right on top of an old concrete slab.
Let's clear things up. Getting the right answers now will help you avoid some of the most annoying problems with pavers over concrete and make sure you’re happy with the results for years to come.
Can I Just Put Sand on Concrete Before Laying Pavers?
It's a tempting idea, but no. A sand bed is a key part of any paver job, but just spreading an inch of it over concrete doesn’t fix the real problems. Think of it like putting a nice rug over a cracked and leaky floor. It looks good for a short time, but the problems underneath are still there.
The concrete slab is a solid, waterproof barrier. Any rain that gets through the paver joints has nowhere to go. It just gets trapped. This creates a perfect home for mold and weeds. In the winter, it’s even worse. The trapped water freezes, expands, and pushes your pavers up.
Also, a thin layer of sand won't stop cracks in the old concrete from showing up in your new pavers. For a project that’s built to last, you need a proper base of packed gravel and sand. That means the old slab has to go.
What If My Concrete Slab Is in Perfect Condition?
Even a brand-new, perfect concrete slab is the wrong foundation for pavers. The number one problem is still drainage. Water is the enemy here. It will seep between the paver joints and get stuck. This creates a swampy mess that turns your sand base into mush.
If you live where it freezes, this trapped water is even more of a problem. When it turns to ice, it expands with great force. It can heave your pavers and turn a flat, safe surface into a bumpy, uneven danger.
And let's be real: no concrete slab stays perfect. The ground under it will eventually settle and shift, causing cracks. When it does, those same cracks will show up right through your pavers.
A flexible base of gravel and sand is always the better choice for an outdoor project. It’s designed to work with nature by allowing for good drainage and absorbing the small movements of the ground.
Is It Ever a Good Idea to Lay Pavers Over Concrete?
Honestly, for any outdoor space that gets rain, snow, or changing temperatures, it's almost never a good idea. The long-term problems from bad drainage, frost heave, and cracking just aren’t worth it. Ask any professional, and they'll tell you to avoid it for patios, walkways, and driveways.
The only time you might think about it is for a completely covered and enclosed area, like a sunroom, that will never get wet. Even then, you’re betting that the slab will never shift or crack.
If you want a project that will look great for years, the best thing you can do is to do it right the first time. That means removing the old concrete and building a stable, well-draining foundation from the ground up. It’s the only way to make sure your new paver surface stays something you can be proud of, not a constant repair job.
Ready to create an outdoor space that stands the test of time? At Tamura Designs Landscape and Construction, we specialize in building beautiful, durable paver patios and walkways the right way. Contact us today to start planning your project.