Got a steep, unusable slope in your yard? Don't look at it as a problem. Think of it as untapped potential just waiting to be unlocked. By strategically building terraces, you can transform that tricky hill into a stunning and practical series of level platforms, perfect for just about anything you can imagine.
Turn Your Hillside Into a Functional Masterpiece
This isn't just about making things look pretty, although that's a huge perk. Terracing is a powerful, time-tested solution for some of the most common headaches that come with a sloped yard. It's hands-down one of the best ways to stop soil erosion and manage water runoff, protecting your topsoil and even your home's foundation from damage.
Unlock Your Yard's Hidden Potential
Let's be honest, a sloped yard can feel like a major limitation. Mowing is a workout, planting can be a nightmare, and letting kids play feels like a risk. Terracing flips that entire script. By carving out flat, manageable spaces, you suddenly open up a whole new world for your outdoor life.
Imagine turning that muddy, weed-covered hill into something truly special:
- A cascading garden: Tiered beds make it a joy to plant and maintain vegetables, flowers, or a mix of native plants.
- An inviting patio: A perfectly level spot for a small seating area, a cozy fire pit nook, or an intimate outdoor dining space.
- A safe play zone: A secure, flat patch of lawn where your family can relax and play without you worrying about a steep drop-off.
The real magic of terracing is how it creates valuable, usable square footage out of what was once unusable space. You're not just flattening land; you're expanding your home's living area and making every inch of your property enjoyable.
A Practical Solution for Erosion and Water Control
Beyond giving you new areas for fun and relaxation, terracing is a top-tier strategy for stabilizing your landscape. When rain comes, water rushes down a bare slope, washing away precious topsoil, exposing plant roots, and depositing mud and debris where you don't want it.
A well-designed terrace system acts like a series of brakes. It intercepts water at each level, giving it time to soak into the ground instead of racing off destructively. This is why soil conservation studies consistently praise its effectiveness.
In fact, terracing a backyard slope can slash erosion rates by up to 70-80%, depending on the steepness and local rainfall. For homeowners in places like California dealing with major hillside erosion, it's a highly recommended practice.
Terracing offers a host of benefits that go far beyond simple aesthetics. Here’s a quick summary of what you gain by tackling that slope.
Key Benefits of Terracing Your Slope
| Benefit | Description |
|---|---|
| Erosion Control | Prevents topsoil loss by slowing down water runoff and allowing it to soak into the ground. |
| Increased Usable Space | Creates flat, functional platforms for gardens, patios, play areas, or lawns. |
| Improved Water Management | Helps retain moisture in the soil, reducing the need for frequent watering. |
| Enhanced Aesthetics | Adds visual interest, structure, and beauty to a previously monotonous slope. |
| Higher Property Value | A well-designed, functional landscape is a major asset that boosts curb appeal and value. |
With a solid plan, you can turn a problematic hill into your favorite part of the yard. You get the peace of mind that comes with a stable, well-managed landscape and a beautiful new space to enjoy. To see more examples of how outdoor structures are transforming properties, check out the latest from Metastat Insight.
Planning Your Project Before You Touch a Shovel
Here’s a hard-earned piece of advice: the difference between a stunning, long-lasting terrace and a project that becomes a major headache is what happens before you ever lift a shovel. It's so tempting to just get started, but rushing into excavation is one of the most common mistakes I see.
A truly successful project for terracing a backyard slope is built first on paper, not dirt. Think of this planning phase as your roadmap—it's what will help you avoid costly errors and ensure the final result is exactly what you envisioned.
Assessing Your Site and Slope
Your first real task is to get intimately familiar with your property. This means walking the site and understanding its unique challenges, starting with just how steep that slope really is.
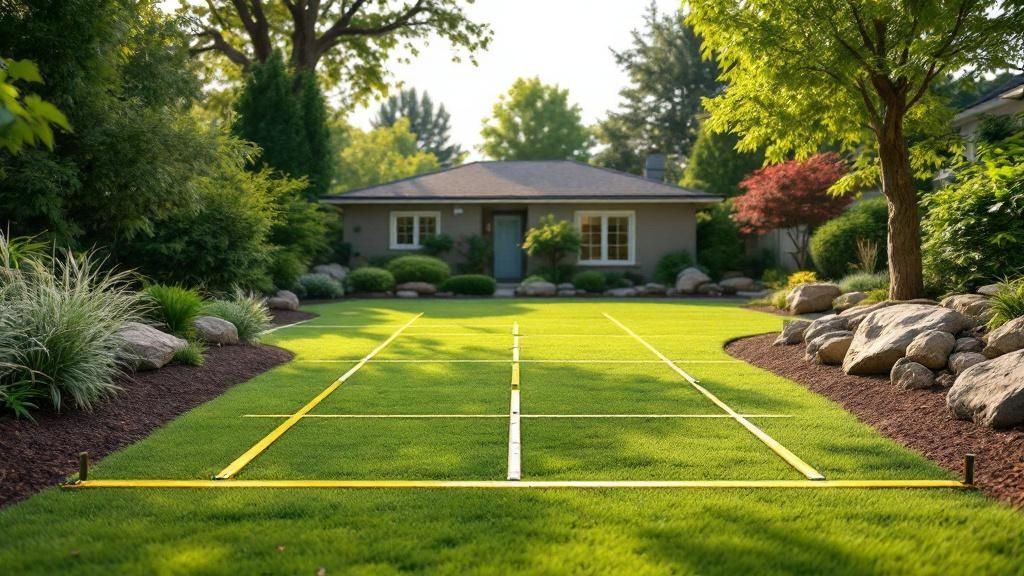
You need to know the grade of your slope, which is simply a measurement of its steepness. You can get a surprisingly precise measurement with a simple line level, two stakes, and a tape measure. Here's how:
- Pound one stake in at the top of the slope and one at the bottom.
- Run a string tightly between them and clip on the line level. Adjust the string until the bubble shows it's perfectly level.
- Now, measure the vertical distance from the string down to the ground at the lower stake—that’s your "rise." The horizontal length of the string is the "run."
Knowing the grade is critical. A gentle slope might be a perfect DIY project. But once you get into steeper grades—we're talking anything over a 2:1 ratio (one foot of vertical rise for every two feet of horizontal run)—you often need a professional engineer to ensure the final structure is safe and stable.
Next, get your hands dirty and learn about your soil. Whether it's sandy, heavy with clay, or a nice loam will dramatically affect drainage and stability. A simple "jar test" gives you a great starting point. Just fill a mason jar about halfway with soil from your slope, top it off with water, shake it like crazy, and let it settle for 24 hours. The layers that form will show you the ratio of sand, silt, and clay.
If you see a lot of clay, pay attention. Clay-heavy soils hold water, which massively increases the hydrostatic pressure behind your future walls and makes robust drainage non-negotiable.
Navigating Permits and Regulations
Before you get too far into the design, it’s time to make a crucial phone call to your local building department. Many municipalities, including those right here in Santa Clara County, have strict rules about retaining walls.
Most jurisdictions require a building permit and an engineered design for any retaining wall over three or four feet in height, measured from the bottom of the footing to the top of the wall. Don't guess on this—always verify the exact height limit with your local office.
Trying to build a tall wall without a permit is a recipe for disaster. It can lead to heavy fines and even an order to tear the whole thing down. This isn't just bureaucracy; it’s about safety. Walls holding back a significant amount of earth are under immense pressure and can fail catastrophically if they aren’t designed and built correctly.
Another absolute must-do is to call 811 before any digging. This free service gets public utility lines marked, preventing a dangerous and expensive accident like hitting a gas line or fiber optic cable. Just remember, this service only covers public utilities. You're on your own for finding private lines like sprinklers or low-voltage landscape lighting.
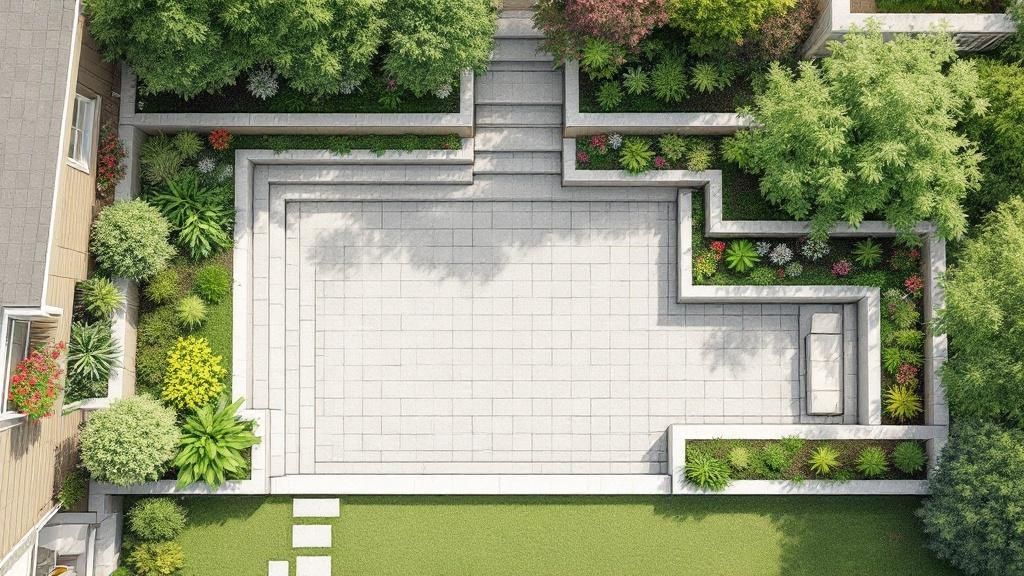
Creating Your Site Plan and Budget
With your site data in hand, you can finally start sketching out a tangible plan. Draw your backyard slope and begin mapping out where you want the terraces to go. Think about how you’ll actually use the space. Will one level be a small patio for a couple of chairs? Will others become dedicated garden beds?
Decide on the rise (height) and run (depth) for each terrace. A great rule of thumb is to keep individual walls at a manageable height, ideally under four feet, to avoid the cost and complexity of engineering. It's almost always better to build more, shorter walls than a few towering ones. And don't forget to plan for access—integrating stairs into your design is a must.
Finally, turn that plan into a realistic budget. This goes way beyond just the cost of the stone or blocks.
Your Budget Should Include:
- Wall Materials: The cost of blocks, stone, or timber.
- Foundation & Drainage: Don't forget the gravel for the footing and backfill, perforated drainpipe, and landscape fabric. These are critical.
- Tools: Factor in rental costs for equipment like a plate compactor or the price of any tools you need to buy.
- Delivery Fees: Heavy materials aren't cheap to get to your house.
- Contingency Fund: This is a big one. Always add 10-15% to your total estimated cost. Unexpected issues always come up, and this buffer will keep your project from stalling out.
This detailed planning ensures that when you finally break ground, you're not just digging aimlessly—you're executing a well-thought-out strategy.
Choosing the Right Materials for Your Retaining Walls
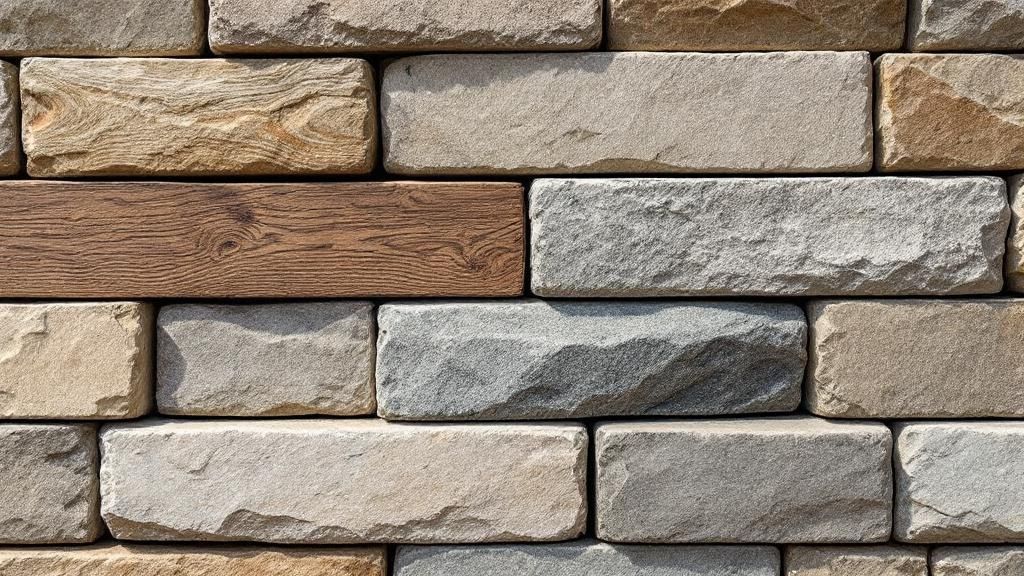
The material you choose for your retaining walls does a lot more than just hold back dirt. It's what sets the whole mood for your backyard and determines how long your hard work will last. It really comes down to balancing aesthetics, your budget, and how much sweat you're willing to put in.
Let’s walk through the most common choices so you can find the perfect fit for your project.
Interlocking Concrete Blocks
If you're planning to tackle this project yourself, interlocking concrete blocks are your best friend. These things are engineered for consistency, with special lips or pins that lock them together. This design makes building a straight, stable wall much simpler. They also come in a huge range of colors and textures, from styles that mimic natural rough stone to sleek, modern-looking blocks.
The biggest perk here is how easy they are to install. You don't need mortar, and their uniform shape takes a lot of the guesswork out of keeping everything level. The trade-off is that they can look a bit… well, manufactured. This might not fit the organic vibe you're going for.
Natural Stone
For a truly timeless, rustic look, you just can't beat natural stone. Every single piece is unique, which gives your wall a ton of character and helps it blend right into the landscape. Whether you go for flat-stacked flagstone or rounded fieldstone, the result is always one-of-a-kind.
Be warned, though: building with natural stone is more like putting together a giant, heavy puzzle. It takes real patience and a good eye to fit all those irregular shapes together into a solid structure. It’s definitely more labor-intensive, but the stunning, organic result is something you’ll be proud of for decades.
Pressure-Treated Timber
Timber walls, often built with railroad ties, bring a classic, warm feel to a garden, especially for shorter terraces. They're relatively easy on the wallet and can be built fairly quickly, making them a go-to for many budget-conscious DIYers.
But wood has its kryptonite: water. Even when it’s pressure-treated, timber will eventually start to rot and attract pests when it's in constant contact with damp soil. For a timber wall, proper drainage isn't just a good idea—it's absolutely critical if you want it to last. A well-built timber wall might get you 15-20 years, while a stone or block wall can easily last a lifetime.
Your choice of material directly impacts the project's complexity and final cost. While timber may seem cheaper upfront, remember to factor in its shorter lifespan compared to the permanence of stone or concrete. We break down these expenses in our comprehensive guide, which can help you better understand the overall cost of a retaining wall.
Gabion Baskets
Looking for something more modern and industrial? Check out gabion walls. These are essentially big wire cages that you fill with rocks. They are incredibly strong and, because water flows right through them, their drainage is fantastic. This makes them a great choice for handling serious water runoff or for building very tall retaining walls.
Building them involves assembling the wire baskets and then filling them up—a process that’s more about muscle than masonry skill. They create a bold, contemporary look that can be a real statement piece in the right setting.
To give you a clearer picture, I've put together a simple table comparing these common materials at a glance.
Terrace Wall Material Comparison
| Material | Average Cost (per sq ft) | Durability | DIY-Friendliness |
|---|---|---|---|
| Interlocking Blocks | $15 – $30 | High | Very High |
| Natural Stone | $25 – $60 | Very High | Moderate |
| Treated Timber | $20 – $40 | Moderate | High |
| Gabion Baskets | $10 – $40 | Very High | Moderate |
Ultimately, the best material is the one that fits your budget, your home’s style, and your own willingness to get your hands dirty. Take your time with this decision—it’s the foundation of your backyard transformation.
The Step-by-Step Guide to Building Your Terraces
With your plans laid out and materials on site, it’s time for the real fun to begin. This is where the hard work pays off, turning a challenging slope into a stunning, usable landscape. Let's get our hands dirty and break down exactly how to build these walls, drawing from our own experience on countless projects.
This visual gives you a great high-level overview of the construction process.
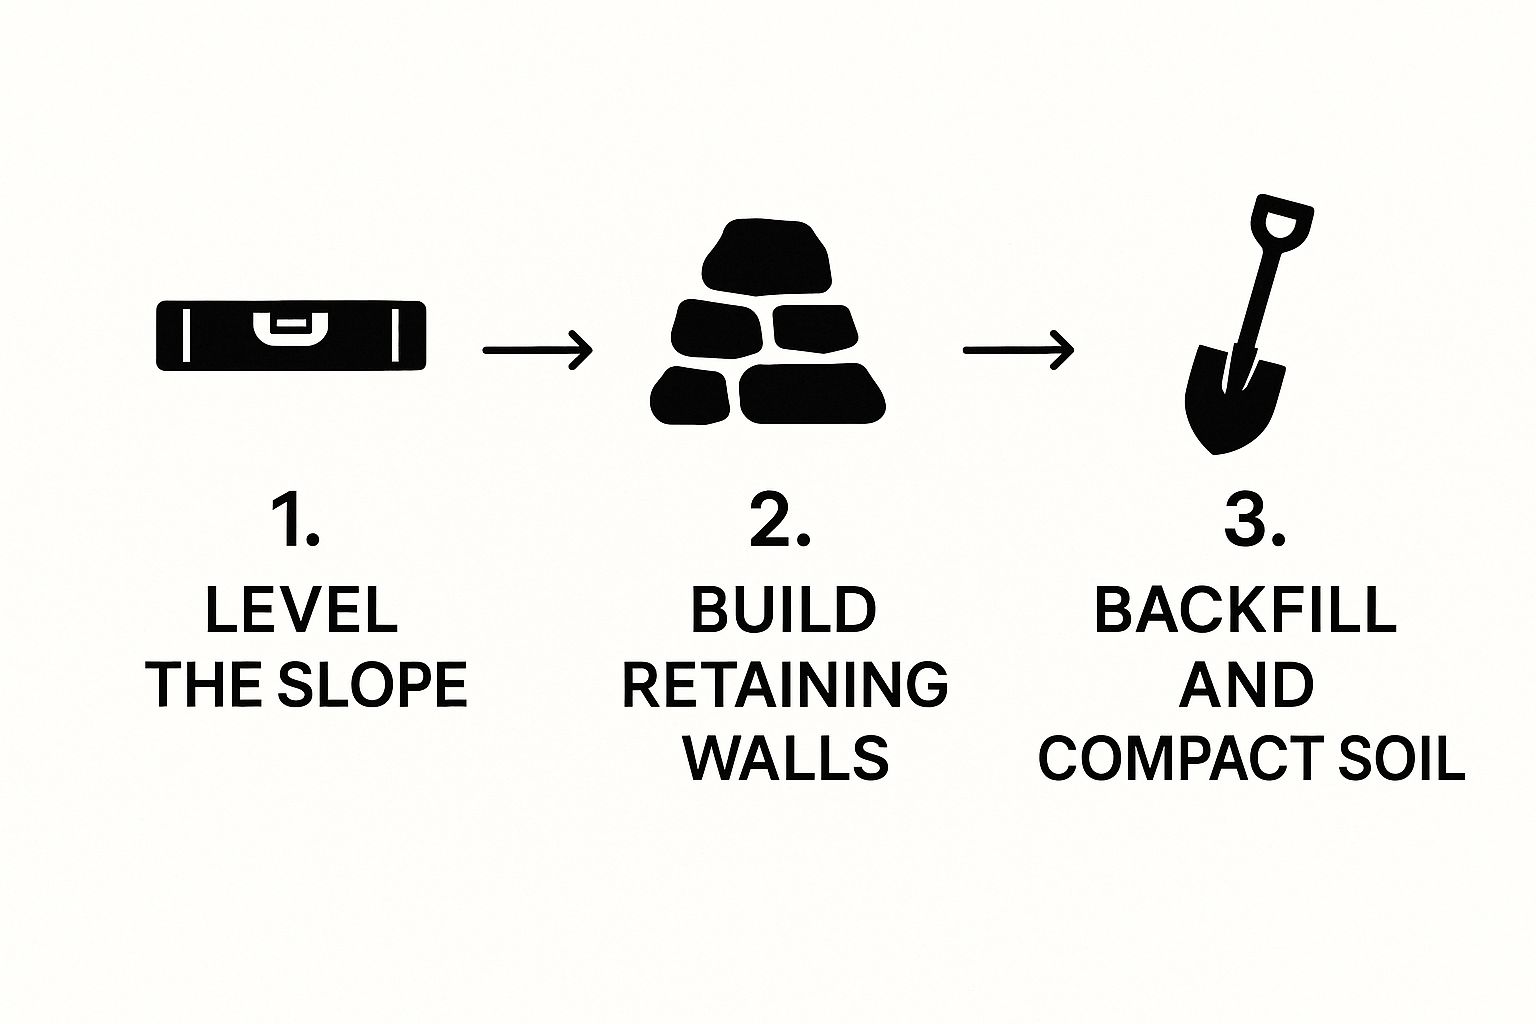
As you can see, the sequence is critical: you level the base, build the wall, and then backfill. Following this order is the key to creating a stable, long-lasting structure.
Excavate and Prepare the Foundation
Every strong terrace wall starts at the very bottom. The first wall you build—the lowest one on your hill—is by far the most important. It's the anchor for everything above it, so don't be tempted to rush this part. A solid foundation is the difference between a wall that lasts a few years and one that lasts decades.
Grab your stakes and string and mark out the location for that first wall, following your site plan. Now, it's time to dig. You'll need to excavate a trench for the wall's base, making it deep enough to bury at least half of your first row of blocks or stones, plus another six inches for a compacted gravel base. So, for a typical 8-inch block, you're looking at digging down about 10 inches.
Once the trench is dug, it's time to create that all-important footing. Fill the trench with about six inches of compactible gravel (something like 3/4-inch crushed stone works perfectly). Then, using a hand tamper or a rented plate compactor, pack it down until it’s rock solid and perfectly level. I can't stress this enough: a weak or uneven foundation is the number one reason walls fail down the road.
Pro Tip: Your foundation trench has to be absolutely, perfectly level from one end to the other. Check it constantly with a long carpenter's level or a line level. Even a small imperfection here gets magnified with every single course you add, leading to a wall that’s visibly crooked.
Laying the First and Subsequent Courses
With your solid, level foundation in place, you can finally start laying the first course of your wall. This first row sets the standard for the entire wall, so take your time. Place each block or stone carefully, checking that it's level both side-to-side and front-to-back. A rubber mallet is your best friend here for tapping things into perfect alignment.
After that first course is set and you've swept it clean of any debris, you can start on the next layers. The key here is to stagger the joints, just like a bricklayer would. This overlapping pattern is what gives the wall its incredible strength.
Another non-negotiable technique for stability is to build in a slight backward lean, which we call batter. This tilt allows the wall to lean into the hillside and resist the immense pressure of the soil behind it. Many modern interlocking block systems are designed with this batter built right in. For timber or natural stone walls, however, you'll need to create it yourself by setting each course back about a half-inch to an inch from the one below it.
Installing Critical Drainage Systems
Water is the ultimate enemy of any retaining wall. The force it exerts—known as hydrostatic pressure—can make a wall bulge, crack, or even completely collapse over time. That’s why a proper drainage system isn't just a nice feature; it's an absolute necessity.
Here's the tried-and-true, three-part system we use to manage water behind every wall we build:
- Gravel Backfill: As you build up the wall, make sure to leave a gap of at least 12 inches between the back of the wall and the dirt hillside. You'll fill this space with free-draining gravel. This creates a vertical channel where water can flow down freely instead of pushing against your wall.
- Perforated Drain Pipe: Right at the base of the wall, nestled into that gravel backfill, lay a 4-inch perforated drainpipe. Make sure the holes are facing down. This pipe acts as a collector, gathering all the water that filters through the gravel and channeling it safely away to a lower spot in your yard.
- Landscape Fabric: Before you add any gravel, line the entire excavated area behind the wall with landscape fabric. This is a crucial step that many people skip. The fabric acts as a separator, preventing dirt and silt from mixing with your gravel and clogging up the drainpipe, which would make the whole system useless.
This three-part combo is the industry standard for a reason. It protects your investment and ensures your new terraces can handle even the heaviest downpours without a problem.
Securing Your Wall for the Long Haul
The last steps in the construction process are all about locking everything together for maximum durability. The specific techniques will vary a bit depending on your chosen material, but they are all vital.
- For Concrete Blocks: After you’ve laid a few courses and backfilled with gravel, run a thick bead of high-strength landscape adhesive along the top of the blocks before setting the next layer. This glues the blocks together, turning individual pieces into one solid, unified structure.
- For Timber Walls: To give a timber wall real strength, you need to pin the layers together. After laying a new timber, drill holes down through it and into the one below. Then, hammer lengths of rebar (usually 1/2-inch thick) down through the holes to lock them together.
Once your first wall is built to its final height, you can backfill the space behind it with topsoil to create your new, level terrace. Add the soil in 6-inch layers, compacting each one down before adding the next. From there, it's just a matter of repeating the process—excavate, level, build, drain, and backfill—for each tier you have planned. This methodical approach to building your terracing on a backyard slope is the secret to a safe, stable, and beautiful final result.
Finishing Touches That Define Your New Space
With the heavy lifting done and your retaining walls standing strong, you’ve hit the most rewarding part of the project. This is where you get to turn that raw construction of soil and stone into a living, breathing part of your home. These final details are what truly bring your vision to life.
A bare wall, while functional, just doesn't look complete. Adding capstones is a relatively simple step that makes a huge difference aesthetically. These flat, oversized stones or concrete pavers sit right on top of your final course, giving the wall a clean, professional edge.
Beyond looks, they also help distribute weight and shield the wall's core from direct rainfall, adding another layer of durability. If you’re using interlocking blocks, a good bead of strong landscape adhesive is all you need to lock the capstones in place. It’s the kind of detail that takes a project from "DIY" to "high-end."
Turning Bare Levels into Green Spaces
Now that you have these incredible new flat areas, the real fun begins. You can design each terrace with a different purpose in mind, creating a dynamic, multi-functional yard. Whether you’re dreaming of lush gardens or a quiet spot to relax, it all starts with the soil.
The backfill you used to create the levels is likely compacted and low on nutrients. Before you plant anything, take the time to amend the top 6-8 inches with high-quality compost or garden soil. This simple step enriches the ground, improves drainage, and gives your new plants the best possible start.
This idea of creating rich, level planting areas on a slope isn't just for backyards. It’s a core principle in modern urban agriculture. In fact, roughly 70% of commercial urban farming and rooftop garden projects in North America use terracing or similar techniques to maximize growing space and keep soil stable.
Ideas for Your New Terraced Levels
So, with fertile ground ready to go, what will you create? Each terrace is a blank canvas.
- Lush Garden Beds: Tiered gardens are a classic for a reason. You can dedicate different levels to different plant types—a vegetable and herb garden on one, a vibrant flower bed on another, and maybe a patch of native grasses on a third.
- A Cozy Patio Nook: One of your levels, especially a wider one closer to the house, could be the perfect spot for a small flagstone or paver patio. Add a couple of chairs and a small table, and you have an instant retreat for your morning coffee.
- A Small Patch of Lawn: If you need a flat, green space for kids or pets, dedicating a terrace to a small lawn is a great solution. Just make sure it has good drainage and gets enough sun.
Once the main structure is built, you could even consider other projects. For example, learning how to install a pergola on one of your new patios can create a stunning, shaded seating area.
Long-Term Maintenance for Lasting Beauty
Your terracing project isn't truly "done" until you have a maintenance plan. A little regular attention will keep your beautiful new space safe and looking great for years to come.
Your main focus should be on two things: wall stability and drainage. At least twice a year—I like to do this in the spring and fall—walk along your walls and inspect them closely. You're looking for any signs of bulging, cracking, or leaning. A tiny bit of settling can happen, but any significant movement might signal a drainage problem you need to fix.
Also, check that your drainage system is actually working. Make sure the outlet of your perforated pipes is clear so water can flow out freely. Clear away any leaves, dirt, or debris that could be causing a blockage. Keeping these pathways clear is the single most important thing you can do to protect your investment.
Choosing sustainable, low-maintenance plants also makes life easier. Our guide to eco-friendly landscaping has a ton of ideas that are perfect for terraced environments.
Common Questions About Terracing a Backyard Slope
Even with the best-laid plans, taking on a project as big as terracing a slope is going to bring up some questions. It’s always best to get these sorted out before the first shovel hits the dirt—it can save you a world of headaches and costly mistakes later on. Here are some of the most common things we get asked by homeowners.
How High Can I Build a Retaining Wall Without a Permit?
This is probably the most critical question, and the answer is different in every city and county. Generally speaking, most places set the limit somewhere between three and four feet high. That measurement is taken from the very bottom of the footing all the way to the top cap of the wall.
Never, ever guess on this. Building a wall taller than your local code allows without a permit can lead to huge fines. In a worst-case scenario, you could even be legally ordered to tear the whole thing down. Your first call should always be to your local building department to get their specific rules before you lock in your design. These regulations exist for a reason—safety.
What Is the Best Way to Manage Drainage Behind Terraces?
If you want your retaining wall to last, proper drainage is non-negotiable. It's the single most important factor. You’re building a defense against the incredible force of water-saturated soil, a phenomenon called hydrostatic pressure, which is the number one reason retaining walls fail.
The tried-and-true system that pros rely on has three essential parts:
- A 12-inch wide column of clean drainage gravel (like 3/4-inch stone) packed right behind the wall blocks.
- A perforated drainpipe laid at the base of the gravel to catch water and carry it away safely.
- Landscape fabric separating the gravel from the native soil. This acts as a filter to stop silt and clay from eventually clogging up your entire drainage system.
When you build a terrace, you're not just stacking blocks; you're creating a system that must actively manage water. A wall without this drainage trio is just a dam waiting to break. This is one corner you can never, ever afford to cut.
Can I DIY a Terrace on a Very Steep Slope?
For gentle to moderate slopes, absolutely. A DIY terrace project is incredibly rewarding for a homeowner who has done their homework and has a solid plan. It's a fantastic way to add immense value and usable space to your property.
But when you start dealing with seriously steep slopes—think anything more than a 2:1 ratio (where the hill drops one foot down for every two feet across)—it's time to call in a professional. The forces at play are extreme, and you really need a landscape architect or a structural engineer to design a safe system that won't risk a dangerous collapse.
How Do I Calculate How Much Material I Need?
Getting your material calculations right from the start saves you from annoying, last-minute runs to the supply yard and keeps the project from stalling out.
Start with a simple formula for your wall blocks or stones:
Wall Length (ft) x Wall Height (ft) = Total Square Footage
Use that number to figure out how many blocks you’ll need based on the size of a single unit. For your gravel base and backfill, you'll need to think in cubic feet:
Wall Length (ft) x Wall Height (ft) x Backfill Depth (ft) = Cubic Feet
Here's a pro tip: always add a 10% contingency to your final material counts. This little buffer is a lifesaver, covering any mis-cuts, waste, or the small mistakes that just happen on big projects.
Once your terraces are built, the fun part begins—planting! For great options that thrive in the sunny, well-drained beds you've just created, check out our list of top drought-tolerant landscaping ideas.
If you're considering a project in the Morgan Hill area and want an expert touch, Tamura Designs Landscape and Construction has over 30 years of experience turning challenging slopes into beautiful, functional outdoor living spaces. Learn more about our custom design and construction services at https://tamuradesigns.com.