Working on a sloped yard can feel like a tough challenge, but it’s a challenge you can win. The secret isn't just hard work; it's smart planning. It all comes down to three main steps: understanding your yard (the slope, soil, and water), creating flat, usable areas with terraces and retaining walls, and making sure water flows where you want it to. If you get these steps right, you can turn a tricky hill into the best part of your property.
Starting Your Sloped Yard Project
Before you order stone for a patio or plan a walkway, you need to get to know your yard. Every good hardscaping project starts with understanding the land. This isn't just about making things look nice; it's about working with nature—like gravity, water, and soil—not against it.
I've seen people skip this first step, and it can lead to a collapsed wall or even a flooded basement. Think of this first stage as your research mission. The information you find will help you make every decision later on. It could save you thousands of dollars in repairs and make sure your new outdoor space is safe and will last for a long time.
Analyze Your Slope and Soil
First, you need to figure out your yard's grade, which is just another word for how steep it is. This one detail will guide the whole project. A small slope might just need a little grading, but a steep hill will likely need strong retaining walls built by a professional.
You can get a basic idea of the grade yourself. Use a couple of stakes, some string, and a line level to measure the "rise" (how much the height changes) over the "run" (a set horizontal distance).
Here's a good rule of thumb I've learned: any slope that drops more than 1-foot over a 10-foot distance is considered steep. This tells you that you'll need serious support, like terraces, to create any flat space.
Next, check your soil. What kind of soil do you have? Is it thick, sticky clay that holds water, or is it sandy and loose, letting water run right through? A simple "jar test" is an old trick that works well. Fill a jar about halfway with soil from your yard, add water, shake it up, and let it sit for a day. The layers that form will tell you what you have.
- Clay-heavy soil: This type of soil expands and shrinks with water, which puts a lot of pressure on retaining walls. You'll need to plan for good drainage, like French drains, to keep water from building up behind your walls.
- Sandy or loamy soil: This soil is better for drainage, but it can wash away easily. You'll need a plan to hold it in place, maybe with special blankets or by planting groundcover.
Map Your Water Flow
The last part of your check is to watch the water. The next time it rains hard, go outside and see how water moves across your yard. Where does it collect? Where does it run the fastest? Most importantly, where does it go near your house's foundation?
Watching the water creates a map that is very helpful for planning drainage. For example, you might see a natural path where water always runs downhill. That's a great spot to build a dry creek bed. This not only solves a drainage problem but also adds a beautiful, natural look to your yard.
Taking the time to do these checks first gives you a blueprint for a hardscape that will last through all kinds of weather.
Building Terraces And Retaining Walls
Trying to figure out what to do with a steep hill can feel like a big problem, but the best plan is often simple: break it up. Instead of one long, unusable slope, you can create a series of smaller, flat areas called terraces.
These terraces are held in place by retaining walls and can completely change a difficult yard. You'll have a set of useful outdoor 'rooms' that are perfect for a garden, a seating area, or even a small lawn for kids.
This method is about more than just looks. Terracing is a great hardscaping method that involves cutting into the hill to create those flat spaces. This not only gives you more usable land but also helps stop soil from washing away by slowing down rainwater. Experts will tell you that building terraces is often a bigger job than people think. It can require heavy machines and careful planning to make sure the walls are strong.
The benefit is that these flat surfaces let water soak into the ground slowly instead of rushing downhill and taking your soil with it.
Planning Your Terraces For Success
Before you start digging, you need a good plan. How tall will each wall be? How wide does each terrace need to be? The answers depend on your yard's slope and what you want to use the spaces for.
For instance, if you want a cozy patio, you’ll need a terrace that's at least 10-12 feet wide to fit a few chairs and a table. If you're just planning for garden beds, a few feet of flat ground might be enough.
A key tip from my experience is to avoid building very tall retaining walls. Walls under four feet are usually easier to build and might not need a permit—but you should always check with your local building department first. I find that shorter walls with wider terraces are more stable and look more natural.
For more details on this process, you can check out our in-depth guide on terracing a backyard slope. It's a great resource to help you get your plan right.
Choosing The Right Wall Material
The material you choose for your retaining walls is a big decision. It affects the project's cost, how long it will last, and its style. Every option has its good and bad points, so it's smart to think about them carefully.
Here is a quick look at the most common choices:
- Natural Stone: Gives you a classic, beautiful look that fits into any landscape. It's very durable but can be expensive and needs a skilled person to install it correctly.
- Concrete Blocks: A very popular choice, especially for DIY projects. These blocks are all the same size and are made to lock together, making them easier to build with. They are also pretty affordable and have a clean, modern look.
- Treated Wood: Often the cheapest option, wood walls can create a warm, rustic look. The downside is that wood doesn't last as long as stone or concrete and will need to be replaced someday.
The photo below shows a worker fitting natural stone—a material known for its strength and natural beauty in hardscaping projects.
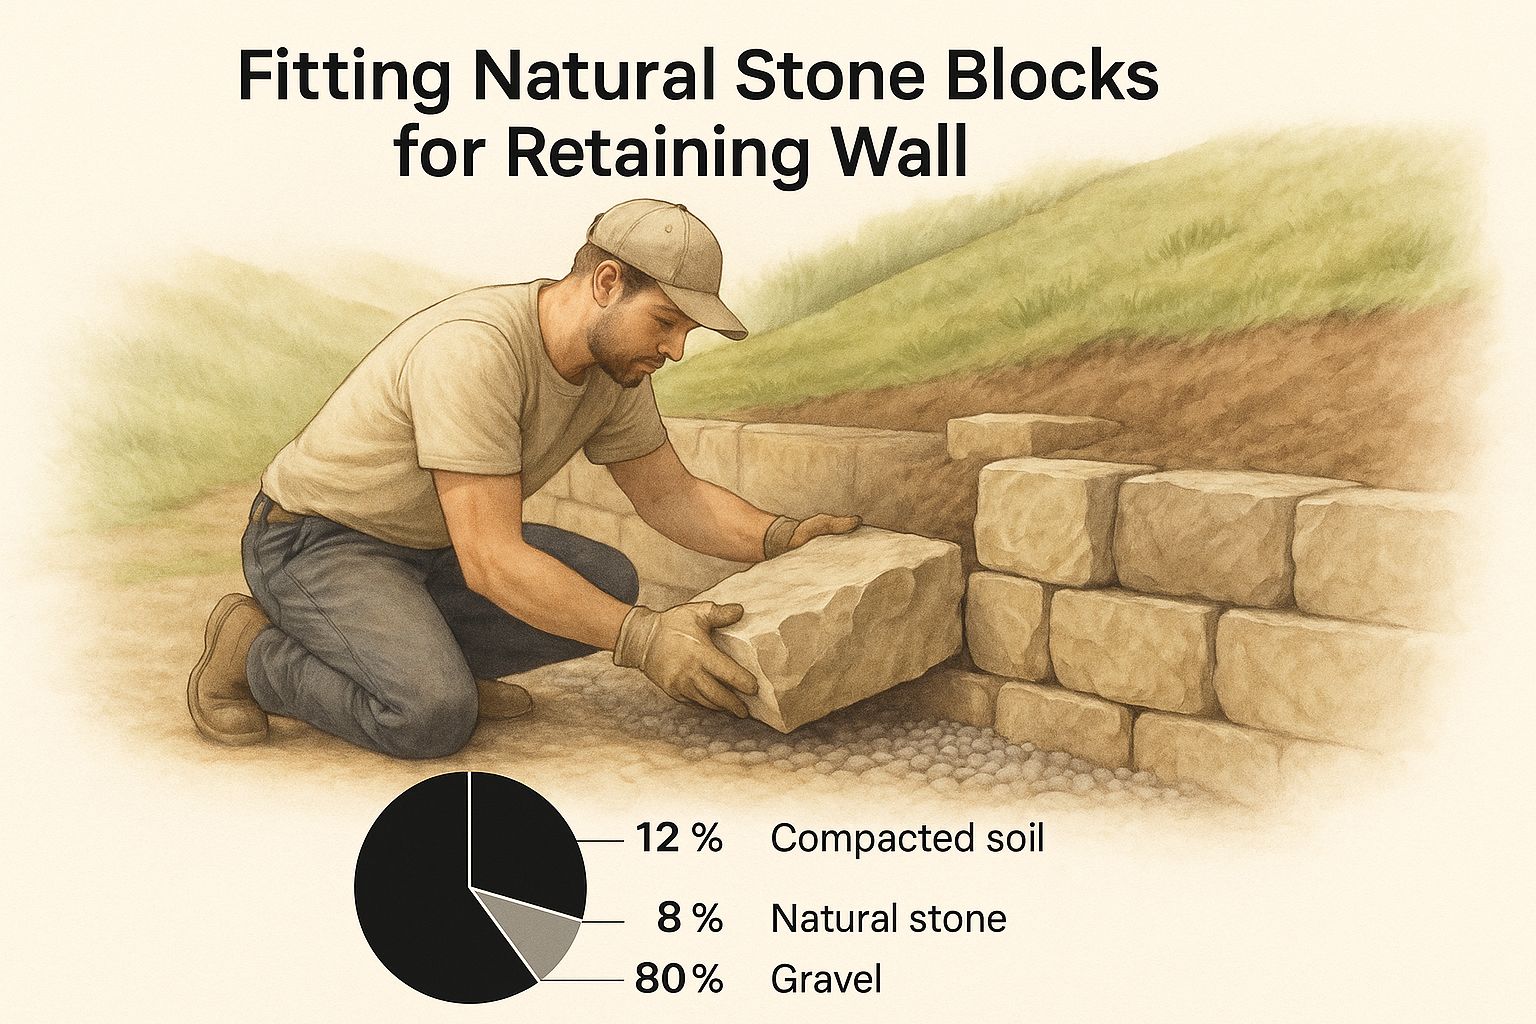
This image shows the skill needed to build a strong and attractive retaining wall, which is key for hardscaping a slope.
To make the choice a little easier, here's a quick comparison of the most popular retaining wall materials.
Retaining Wall Material Comparison
| Material | Average Cost per Sq. Ft. | Lifespan | DIY Friendliness |
|---|---|---|---|
| Treated Wood | $25 – $40 | 15-20 years | High |
| Concrete Blocks | $30 – $50 | 50-100 years | High |
| Natural Stone | $40 – $100+ | 100+ years | Low |
Each material has its place. The "best" one really depends on your budget, what you want for your property in the long run, and how much work you want to do yourself.
Proper Construction Is A Must
No matter what material you pick, building the wall correctly is extremely important for its safety and how long it lasts. A badly built retaining wall is not just ugly; it's a real danger that can fail under the pressure of soil and water.
There are three key parts of a strong wall that you can't skip:
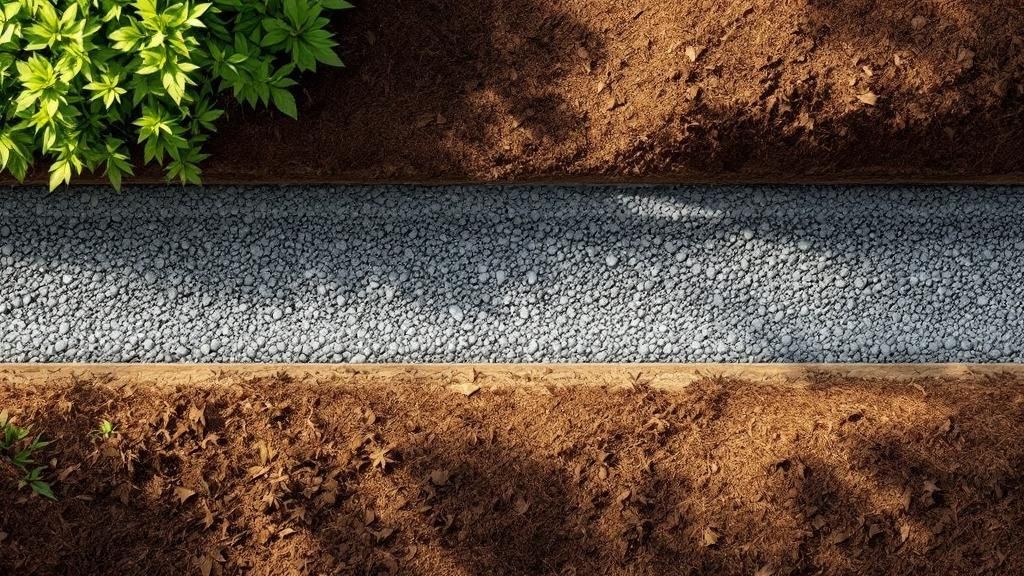
- A Level Gravel Base: The very first row of blocks or stones has to sit on a packed gravel base. This is what keeps the whole wall from shifting over time.
- Backfill and Drainage: You must leave space for a layer of gravel right behind the wall. This creates a path for water to drain away instead of pushing against your wall.
- A Perforated Drain Pipe: A drain pipe with holes, placed at the bottom of the wall behind the gravel, is needed to carry water away and stop pressure from building up.
Cutting corners on any of these steps is a common mistake that can lead to bulging or collapsed walls later on. If you take the time to build a strong foundation and manage water from the start, you'll have a hardscape that will last for decades.
Solving Drainage on a Sloped Yard
When you're working with a slope, gravity is your biggest challenge, and water is its main tool. Water runoff that isn't controlled can easily damage a new patio, wash out soil from behind your retaining walls, and even put your home's foundation at risk.
Thinking about drainage isn't something to do at the end. It's the most important step you can take to protect your hardscaping project. A good drainage plan turns water from a destructive problem into something you can manage.
Create Hidden Drainage Channels
One of the best ways to manage water on a slope is with a French drain. Think of it as a hidden, underground gutter that catches and moves water before it can cause problems. It's something you must have behind any retaining wall.
A French drain gives water an easy path to follow. We dig a trench, line it with a strong landscape fabric, put in a pipe with holes, and then fill the trench with gravel. This system collects any water moving through the soil and carries it safely away to a lower spot in your yard.
From my experience, the biggest mistake homeowners make is not putting a drain behind a retaining wall. The pressure from wet soil can cause even the best-built walls to bulge and fail over time.
For more ideas on controlling water flow, our complete guide offers many backyard drainage solutions to keep your property dry and safe.
Work With Nature Using Dry Creek Beds
Sometimes, the best drainage solution is one that doesn’t look like one. A dry creek bed is a shallow, winding channel lined with stones and boulders that looks like a natural streambed.
It is a feature that does two jobs. Most of the time, it's just a beautiful, low-maintenance part of your landscape. But when a big storm comes, it becomes a path for water, guiding runoff where you want it to go and stopping it from washing out your yard.
- Follow the Flow: Watch where water naturally goes down your slope during a rain, and use that as the path for your creek bed.
- Vary the Stone: A mix of large boulders, medium river rocks, and smaller pebbles will look much more natural.
- Bring in Plants: Planting grasses and flowers that don't need much water along the edges will soften the look and help hold the soil in place.
Using Plants and Mats to Control Erosion
While hardscaping provides the main structure, don't forget the power of plants to hold everything together. On the steeper parts of your yard where you might not be building walls or patios, plants and special fabrics are your best defense against soil washing away.
One of the best methods is using erosion control mats. These are fabrics that break down over time. You lay them over the soil to hold it in place, which can reduce erosion by as much as 80% on new slopes. When you use these mats with tough ground cover plants like creeping juniper or native grasses, the soil becomes even more stable. In fact, studies show that this combination can reduce the amount of water runoff by up to 40%.
By using these different drainage methods, you build a strong system that not only protects your hardscape but also turns your slope into a stable, beautiful, and lasting part of your home.
Choosing the Best Materials for a Slope
Now we get to the fun part. Picking the right materials is when your ideas for a sloped yard start to become real. But it's about more than just looks. The materials you choose will determine how long your new patio, walkway, and garden features will last. On a slope, every single piece has to do its job well.
We're not just picking pretty colors. We need to think about how these materials will handle pressure from the soil, how they'll manage water, and if they'll stay in place for years.
Materials for Patios and Walkways
When you're creating a flat, usable space like a patio on a slope, interlocking concrete pavers are almost always my top recommendation. They are designed to lock together, creating a surface that is both very strong and flexible. A solid concrete slab might crack as the ground shifts, but a paver patio can move with the ground, which is just what you need on a slope.
For walkways and stairs, being stable is the most important thing. You need a surface that isn't slippery and feels solid when you walk on it.
- Natural Flagstone: Putting irregular flagstone pieces into a packed base of gravel and sand creates a beautiful, rustic, and stable path that looks natural on a hillside.
- Cut Stone or Pavers: If you want a cleaner, more formal look, evenly cut stone or concrete pavers can be used to build elegant steps that are both safe and beautiful.
No matter what you choose, a deep, well-packed gravel base is something you cannot skip for any flat surface on a slope. If you’re trying to choose between options, our guide on the best patio pavers explains the pros and cons to help you decide.
Using Rock for Stability and Style
Stone isn't just for patios and paths; it's also a key tool for holding the slope together. A well-placed boulder or a thoughtfully designed rock garden isn't just for looks—it helps control erosion. Placing large boulders into the steepest parts of your yard can hold the soil and keep it from washing away.
Rock gardens are a great two-for-one solution. They add amazing texture and rugged beauty while also providing real erosion control that works with the hillside to lock soil in place during heavy rain.
In fact, some data shows that well-designed rock beds can reduce soil loss by up to 60% on hillsides. When you use local stones that match the area and pair them with native plants, you can also cut water use by 30-50% compared to a regular lawn.
This approach turns a problem area into a beautiful, low-maintenance feature that is also protecting your landscape. It’s the perfect way to hardscape a sloped yard by mixing smart design with natural beauty.
Your hardscape is the strong frame of your new outdoor space, but plants and lighting are what really bring it to life. Think of these final touches as the soul of the project. They turn a functional building job into a warm, welcoming place you can enjoy day or night.
Softening the hard edges of stone with plants makes the whole design feel more natural. At the same time, the right lighting not only makes your yard safer after dark—it creates a whole new mood and adds beauty. This is the final step in learning how to hardscape a sloped yard.
Choose Plants That Work With Your Slope
Not all plants can live on a hillside. The best choices for a sloped yard are tough, low-maintenance plants that help control erosion. You're looking for plants with strong, deep roots that will help hold the soil in place.
In my experience, plants that don't need a lot of water are usually a good choice, since slopes tend to dry out faster than flat ground.
Here are a few types of plants that go well with a new hardscape:
- Creeping Groundcovers: Plants like Creeping Thyme or some types of Sedum are great for spilling over the edges of retaining walls and filling in gaps between stones. They do a great job of softening the look and stopping weeds.
- Deep-Rooted Grasses: Ornamental grasses, like Blue Fescue, add great texture and movement. Their thick roots are also great at holding soil on steeper parts.
- Tough Perennials: Look for strong plants that don't need a lot of care. Things like Lavender or Coneflower need very little water once they are settled in and will give you color year after year.
A great pro tip: Choose plants that hang down for the top of your retaining walls. As they grow and drape over the side, they'll beautifully soften the line between the hardscape and the garden.
Illuminate Your Landscape for Safety and Drama
Landscape lighting does more than just help you see where you're walking. It completely changes the feel of your yard after the sun goes down. A good lighting plan adds a touch of class and makes your outdoor space usable all the time.
Good lighting design is about using different types of light for different effects. Before you start, just think about what you want to show off.
Simple Lighting Techniques:
- Path and Step Lighting: This is a must for safety. Use small, low-voltage lights to light up walkways and stairs. It creates a welcoming path through the yard and prevents falls.
- Uplighting: Do you have a beautiful tree or an interesting part of your house? Place a spotlight at its base pointing up. This simple trick creates a beautiful, dramatic highlight.
- Wall Washing: Place lights near the bottom of your retaining walls and aim them upward. This creates a soft glow that shows off the texture of the stone and makes the whole space feel cozy.
These finishing touches are what make all your hard work look great, turning a difficult slope into a beautiful and useful outdoor space.
Have Questions About Your Sloped Yard? We've Got Answers
Even with the best plans, problems can come up. When you're working with a sloped yard, you're almost sure to have questions. That's completely normal. Over the years, we've heard them all, so let's go over a few of the most common issues.
Getting these things right from the start will save you a lot of trouble, time, and money.
Do I Need a Permit for a Retaining Wall?
This is a big question, and it's a good one to ask. The answer usually depends on two things: your local building rules and the height of the wall you’re planning.
Most cities set a limit somewhere around three or four feet. If your wall is taller than that, you will almost certainly need a permit. This usually means you have to submit professional plans for approval before you can start building.
My best advice? Just call your local building department first. It's a quick phone call that makes sure everything you're doing is safe, legal, and follows the rules from the very beginning.
Can I DIY a Really Steep Slope?
Look, working on a gentle slope with a small retaining wall can be a fun weekend project. I understand that. But a steep hill? That's a completely different situation.
When you're dealing with a steep slope, you're facing serious challenges. We're talking about soil that might not be stable, major water drainage problems, and huge pressure pushing against anything you build. Honestly, these are problems that need a professional engineer or an experienced landscape architect to solve safely. For any big slope, hiring a pro isn't just a good idea—it's necessary to make sure your hardscape is safe and will last.
What Is the Cheapest Way to Hardscape a Slope?
Working on a slope can be expensive, but you don't have to spend a fortune. If you are watching your budget, here are a few smart ways to keep costs down:
- Consider Treated Wood: For retaining walls, pressure-treated wood is often the cheapest material, especially when compared to concrete blocks or natural stone.
- Go Wider, Not Higher: Instead of planning lots of small, short terraces, designing fewer, wider levels often means you need fewer walls. This directly cuts down on material and labor costs.
- Use More "Softscaping": Don't forget the power of plants. For some parts of the slope, using thick groundcover with erosion control mats can be a very good and affordable way to keep your soil where it belongs.
Ready to turn that challenging slope into a beautiful, functional outdoor living space you'll love? The award-winning team at Tamura Designs Landscape and Construction has over 30 years of experience creating stunning, sustainable landscapes in Morgan Hill and beyond. Let's build your dream yard together.