Before you even think about picking up a tool, a successful rainwater collection system installation starts with a solid plan. It's all about taking a good look at your property, figuring out how much water you can realistically collect, and matching that to what you actually need. Getting this groundwork right from the start saves you from expensive mistakes down the line and ensures you end up with a system that's efficient and right for you.
Planning Your Rainwater Harvesting Project

Long before you order a tank or touch a downspout, your rainwater project needs to take shape on paper. I can't stress this enough: this initial phase is the most critical part of the whole process. It’s where you ask the right questions and gather the data to design a system that truly works.
I’ve seen it happen too many times—people rush this stage and end up with undersized tanks, poor collection rates, or even legal troubles. A well-designed system should feel like a natural part of your property, almost like it was always meant to be there. This is especially true for projects like off-grid shipping container modular homes, where water self-sufficiency isn't just a bonus, it's a necessity.
Define Your Water Usage Goals
First things first: what are you going to do with all that water? This is the most important question to answer because it will dictate the size, cost, and complexity of your entire setup. Your goals will likely fall into one of two buckets.
- Non-Potable Use: This is where most people start. We're talking about using rainwater for watering the garden, washing the car, topping off the pool, or even flushing toilets. These uses don't require super-intensive filtration, making it a great entry point.
- Potable Use: If you want to drink the water, get ready for a more complex and expensive system. You’ll need a multi-stage filtration and purification setup—think sediment filters, carbon filters, and a UV sterilizer—to make the water absolutely safe for consumption.
Your goal directly impacts everything else. A simple 55-gallon rain barrel might be perfect for a small vegetable garden, but if you're looking to irrigate your whole yard, you’ll probably need something closer to a 5,000-gallon cistern.
Calculate Your Potential Water Supply
Next, let's ground your goals in reality. You need to estimate how much water your property can actually collect. This isn’t a guessing game; it’s a straightforward calculation based on your roof’s footprint and your local rainfall.
To get your catchment area, just measure the footprint of your house (length times width). Don't worry about the slope or pitch of the roof itself. So, if your house is 50 feet long and 30 feet wide, your catchment area is 1,500 square feet.
Here's the simple formula we use:
Catchment Area (sq. ft.) x Rainfall (inches) x 0.623 = Gallons Collected
That 0.623 is just a standard conversion factor. So, with that 1,500 sq. ft. roof, a single inch of rain can yield around 934 gallons of water. It adds up fast! Just look up your area's average monthly or annual rainfall to get a good forecast of your potential supply.
Assess Your Site and Check Regulations
Finally, it’s time for a walk around your property. Where is the tank going to go? You’ll want a spot that's flat, stable, and reasonably close to your downspouts. Also, think about how this fits into your overall water management. Rainwater collection is often part of a bigger picture, and it pairs well with comprehensive backyard drainage solutions that prevent soggy lawns and protect your foundation.
Just as important is checking the local rulebook. Before you finalize anything, you absolutely must investigate:
- Local Building Codes: Are there rules about how far tanks must be from property lines? Will you need a permit if your system is over a certain size?
- Health Department Regulations: If you're aiming for drinkable water, they'll have very specific rules about filtration and testing that you have to follow.
- Homeowners' Association (HOA) Rules: Some HOAs have strict guidelines on aesthetics, which might limit where you can place a tank or even what color it can be.
Tackling these planning stages with care will make sure your installation goes smoothly and leaves you with a functional, legal, and valuable addition to your home.
Of course. Here is the rewritten section, crafted to sound like it was written by an experienced human expert, following all your specific formatting and style requirements.
Choosing the Right System Components
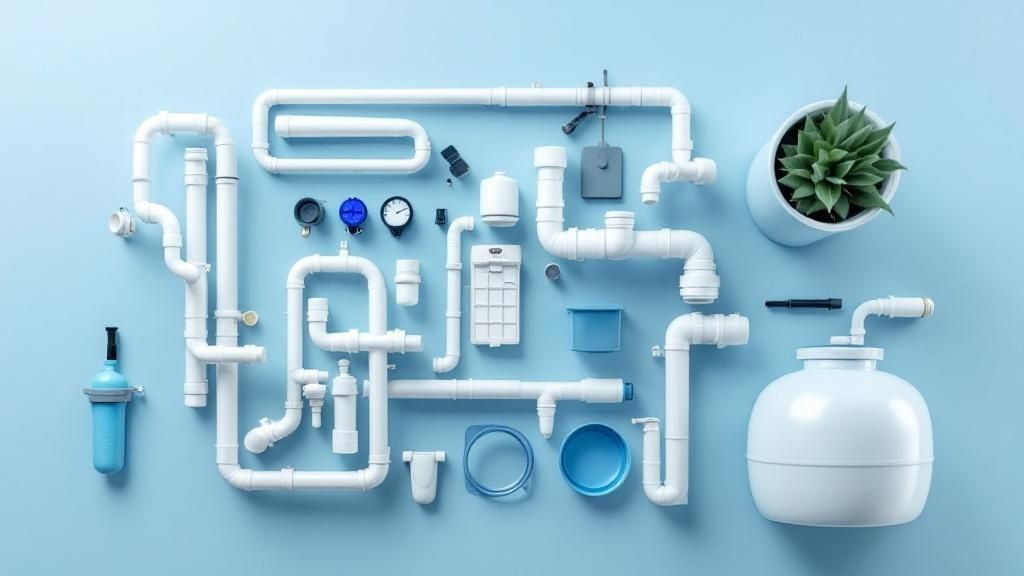
The long-term success of your rainwater harvesting setup really comes down to the hardware you choose. I like to think of it as building a team—if one piece of equipment isn't up to the task, the whole system can start to struggle. Let's walk through how to source the essential parts so you can buy with confidence.
Putting your money into quality components isn't just about the upfront cost; it's an investment in the system's future efficiency and how long it'll last. This is becoming a bigger deal as more people get into rainwater harvesting. The global market for these systems hit a value of $2.8 billion in 2023 and is on track to nearly double. That shows a real shift toward water independence. In fact, the market is growing at a steady clip of 6.7% every year.
Selecting Your Storage Tank
Your storage tank is the heart of the whole operation and will likely be your biggest single purchase. The best one for you depends on your budget, local climate, and how much space you've got. The material and size you land on will directly impact your system's capacity and how many years you get out of it.
You'll find three main materials out there, and each has its own pros and cons.
To help you decide, here’s a quick breakdown of what to expect from the most common rainwater storage tank materials.
Rainwater Storage Tank Comparison
| Tank Material | Pros | Cons | Best For |
|---|---|---|---|
| Polyethylene (Plastic) | Lightweight, affordable, rust-proof, easy to install. | Can be damaged by UV over time if not stabilized. | Most residential setups, DIY projects, and budget-conscious installations. |
| Metal (Galvanized Steel) | Extremely durable, large capacities available, long lifespan. | Heavier, more expensive, requires a liner to protect water quality. | Large-scale collection for homesteads, farms, or commercial properties. |
| Concrete | Very strong, can be installed underground, long-lasting, naturally neutralizes acidic rain. | Highest cost, labor-intensive installation, potential for cracking if not installed perfectly. | Permanent, high-capacity underground installations where space is a premium. |
No matter which material you go with, always lean toward a bigger tank than you think you'll need. One of the most common mistakes I see is people underestimating their water usage or being a bit too optimistic about consistent rainfall. It’s far better to have that extra capacity during a dry spell than to run dry when you need it most.
Essential Conveyance and Pre-Filtration Gear
Before a single drop of water gets to your tank, it needs to be guided off the roof and given a preliminary cleaning. This is where your conveyance and pre-filtration components come in. Trying to save a few bucks here is a classic mistake that leads to clogs and poor water quality down the road.
Your existing gutters and downspouts are the starting point. Make sure they’re clean, in good shape, and sloped correctly to keep water moving. From there, you'll need to add a couple of non-negotiable pieces of hardware.
Pro Tip: Your first line of defense is always at the gutter level. Good-quality leaf guards or gutter screens will stop the vast majority of leaves and twigs from ever getting into your downspouts, which saves you a ton of maintenance work later on.
The next critical piece is a first-flush diverter. This is a simple but brilliant device. It diverts the first few gallons of rain—which rinses all the dust, pollen, and bird droppings off your roof—away from your tank. Once the roof is "washed," the diverter automatically sends the cleaner water into storage.
Pumps and Final Filtration for Usable Water
Okay, so the water is in the tank. Now you need a way to get it out and make sure it's clean enough for whatever you plan to use it for. This is where pumps and final filters step in.
The right pump really just depends on your specific setup and needs:
- Submersible Pumps: These go right inside the tank. The big advantage is a quiet, clean-looking installation. They're fantastic for pushing water over long distances or uphill.
- External (Jet) Pumps: These are set up outside the tank, which makes them much easier to get to for maintenance. They are a reliable workhorse for most irrigation and other non-potable household uses.
The final piece of the puzzle is filtration, and this should be matched to how you’ll use the water. If it's just for watering the garden, a basic sediment filter at the tank's outlet is probably all you need to protect your pump and hoses from grit.
But if you're aiming for potable (drinkable) water, your filtration system needs to be much more serious. A typical setup for safe, clean drinking water involves a few stages:
- A sediment filter to catch sand, silt, and other chunky bits.
- A carbon filter to handle organic compounds, pesticides, and any weird tastes or smells.
- A UV purifier is the final kill step. It uses ultraviolet light to zap bacteria, viruses, and other microorganisms, making the water completely safe to drink.
Assembling Your Rainwater Collection System
This is where the real fun begins. All that planning and careful component selection is about to pay off as we get hands-on with the rainwater collection system installation. Think of it less like a construction project and more like connecting the dots, with each task building on the last to create a secure, leak-free system.
We’re going to work from the ground up. We'll start with the most critical safety element—the tank base—and then work our way through connecting the gutters, pipes, and filters. By the end, that pile of parts will be a fully functional water source for your property.
Preparing a Rock-Solid Tank Foundation
Before you even think about moving your tank, you need to build its foundation. I can't stress this enough. A full 1,000-gallon tank weighs over 8,300 pounds. An unstable base is a recipe for disaster, risking a tank failure that’s both dangerous and a total waste of your hard work.
The goal here is a perfectly level, stable pad that distributes that immense weight evenly. Start by clearing the ground of any vegetation, rocks, or roots. Then, get to compacting. A hand tamper might do the trick for smaller pads, but for larger tanks, renting a plate compactor is a small price to pay for peace of mind.
A popular method is to build a framed base:
- Build a frame with pressure-treated lumber, making it slightly larger than your tank’s diameter.
- Fill the frame with about 4-6 inches of sand or fine gravel.
- Screed it perfectly level. Use a long, straight board and a spirit level, checking in multiple directions until it’s dead flat.
If you’re looking for a solution that’s a bit more integrated into your landscape, you could even build the base out of permeable pavers. Learning what are permeable pavers can open up some great ideas for a base that is both functional and beautiful, and even helps with surrounding drainage.
Gutter and Downspout Modifications
Once the tank has a solid home, it's time to look up at the roofline. Your gutters are the arteries of this system, so they need to be prepped to send water exactly where you want it. This usually means a little surgery on your existing downspouts.
First, pick the downspout closest to your tank. You’ll be intercepting the water flowing through it. This might mean cutting into the existing downspout to fit a diverter, or you might just remove a whole section and replace it with new piping aimed at your collection system.
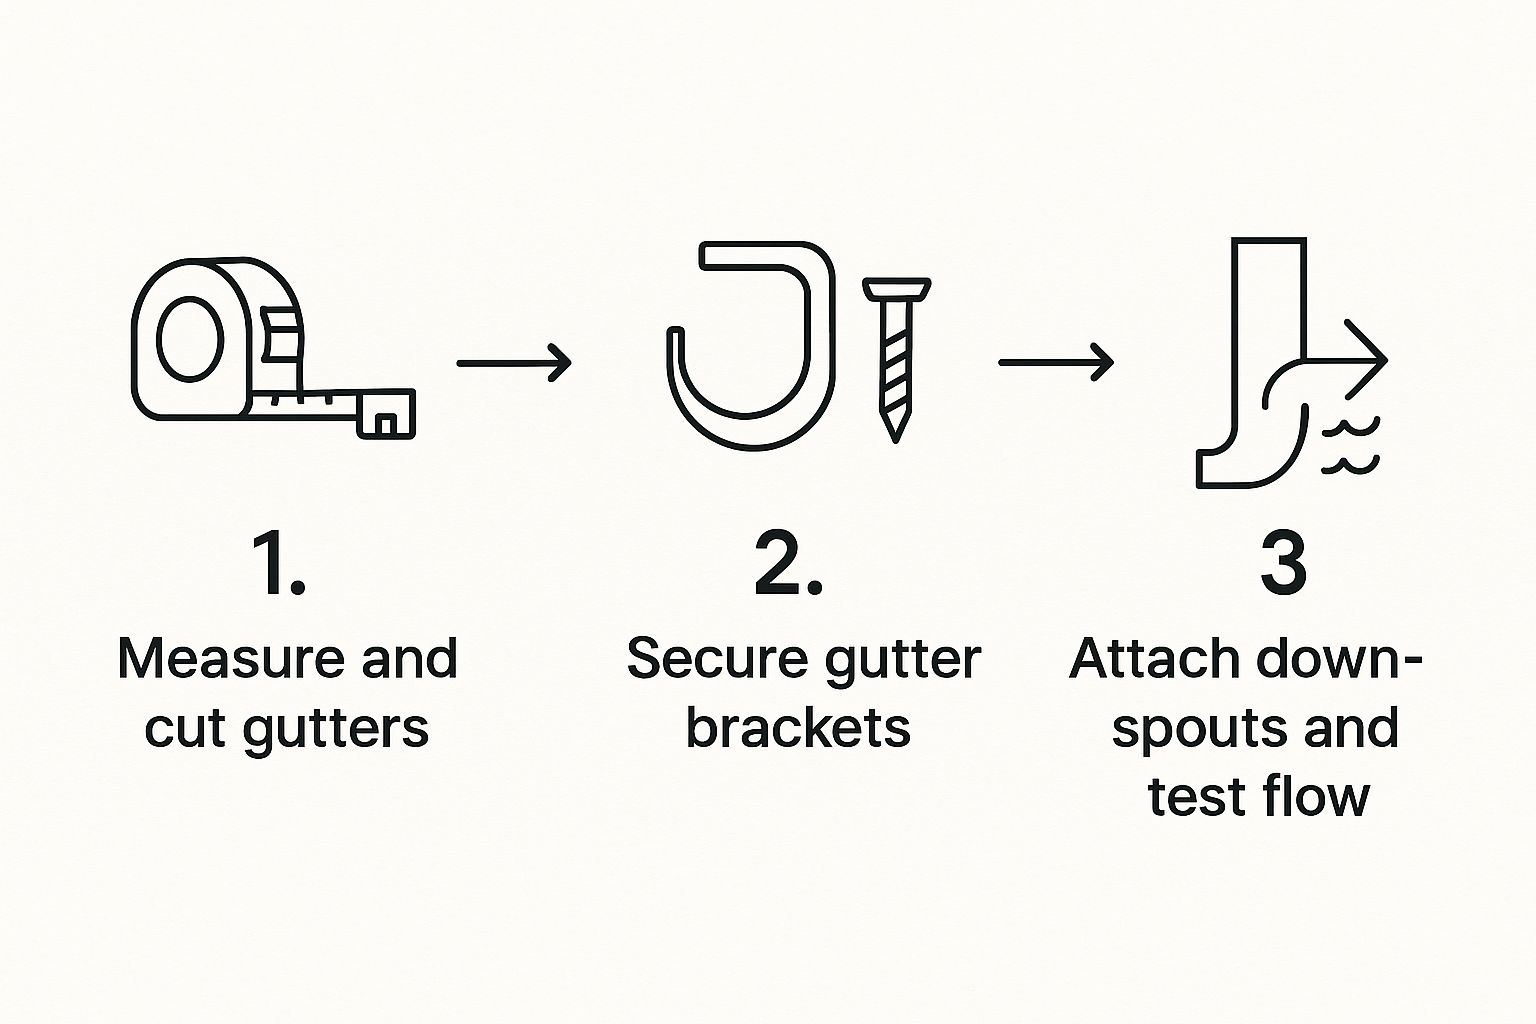
This image really breaks down the core steps. A successful installation all comes down to measuring carefully, fastening everything securely, and making sure the water flows where it’s supposed to.
Connecting the Conveyance and Filtration Train
Now it’s time to connect all the pieces. This part feels like putting a puzzle together—every component has its specific place and job. The water will flow from the downspout, through your pre-filters, and finally land in the tank.
Start by attaching your new piping or diverter to the modified downspout. Use PVC or another smooth-walled pipe to carry the water. Make sure you build in a slight, consistent downward slope. A good rule of thumb is a quarter-inch drop for every 10 feet of pipe, which keeps water moving and prevents gunk from building up.
Next, install your pre-filtration gear in line. The first-flush diverter is absolutely essential and should be placed in the pipe before the water gets to the tank. This ensures that the first, grimiest runoff from your roof gets discarded. After that, you might have another screen or leaf basket right at the tank's inlet for extra protection.
Insider Tip: Every joint needs a watertight seal. Use PVC primer and cement for your permanent connections. For any parts you'll need to clean or service, like filters, use threaded fittings with Teflon tape or quality rubber gaskets. A tiny drip now will turn into a massive headache later on.
If you want a really detailed, step-by-step walkthrough for the main storage unit, you can find a comprehensive tank installation guide from industry pros.
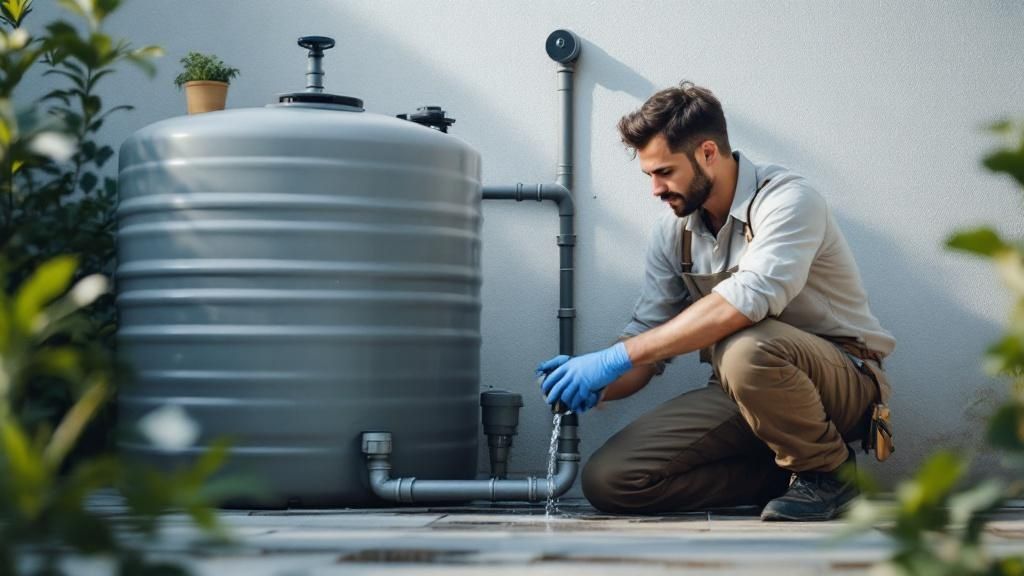
Final Tank Connections and Overflow Setup
The last major assembly step is hooking the inflow pipe to your tank's inlet. Most tanks have pre-molded spots where you can easily drill and install a bulkhead fitting for a perfect seal.
Just as important is the overflow. No system is truly complete without one. An overflow port is your tank's safety valve, preventing it from over-pressurizing and bursting when it gets full during a heavy downpour. This port should be the same size or even bigger than your inlet pipe.
Make sure you route that overflow pipe far away from the tank's base and your home's foundation. A fantastic option is to direct it toward a rain garden or another thirsty spot in your yard. Whatever you do, don't just let it spill out at the base of the tank—it will quickly erode the foundation you worked so hard to build.
With everything connected, it's time for a "dry run." Before the next big rain, grab a hose and run some water through the whole setup to check every single connection for leaks. It's so much easier to fix a small drip now than when your system is holding hundreds of gallons of precious rainwater.
Connecting Pumps and Filters for Usable Water
Alright, your tank is in place and the gutters are hooked up. You’ve successfully handled the "collection" part of your rainwater collection system installation. Now it's time for the fun part: making that water genuinely useful.
This means adding pressure and cleaning it up for whatever you have in mind. It might sound technical, but think of it as creating a "treatment train." Water leaves the tank, gets pressurized, and then runs through a series of filters before heading off to a garden hose or even your kitchen tap.
Selecting and Installing the Right Pump
First things first, you need to give that water some muscle. A pump is what creates the pressure necessary for pretty much everything, from watering the lawn to running a washing machine. The right pump really comes down to your system’s layout and what you’ll be doing with the water.
- Submersible Pumps: These guys go right inside the tank. They’re fantastic—quiet, powerful, and great at pushing water uphill. The only real downside is that if you need to service one, you’re fishing it out of the tank.
- External (or Jet) Pumps: These sit outside the tank, making them a breeze to access for maintenance. They’re total workhorses that pull water from the tank, perfect for most irrigation setups and other non-potable uses around the house.
Here’s the most important tip I can give you for installation: protect your pump from running dry. Most quality pumps now include a dry-run protection feature. It’s a lifesaver—a sensor that simply shuts the pump off when the tank’s water level gets too low, preventing a costly burnout.
Imagine your 2,500-gallon tank runs empty during a long dry spell. An unprotected pump would keep running, overheat, and destroy its motor within hours. With dry-run protection, it just patiently waits for the next rain to refill the tank.
Building Your Filtration Train
With the pump sorted, it’s time for filters. The trick here is to line them up in the right order, always moving from coarse to fine. This simple sequence protects every component down the line and makes the whole process far more effective.
Your very first line of defense should always be a sediment filter. Its only job is to catch any grit, sand, or other large gunk before it chews up the sensitive inner workings of your pump. Placing this after the pump is a rookie mistake you don't want to make.
From there, the rest of your filtration train is all about your end goal. If you’re tying into existing household plumbing or dealing with more complex pipework, it’s often wise to consult with professional plumbing services to make sure everything is installed correctly and leak-free.
Advanced Filtration for Potable Water
Thinking of drinking your rainwater? It’s absolutely possible, but you’ll need to expand your filtration train. This multi-barrier approach is the industry standard for creating water that’s safe enough to drink.
Here's a look at a typical setup for potable water:
- Sediment Filter (e.g., 50-micron): This catches the big stuff first, protecting the more delicate filters that follow.
- Finer Sediment Filter (e.g., 5-micron): This stage removes the smaller suspended solids that slipped through the first filter.
- Activated Carbon Block Filter: This is your taste and odor specialist. It’s brilliant at removing organic chemicals, pesticides, and other compounds that make water smell or taste off.
- UV Sterilizer: The final, non-negotiable step for safety. Water flows past an ultraviolet light that kills 99.99% of bacteria, viruses, and other nasty microorganisms, all without adding a single chemical to your water.
A pro tip: plumb each filter housing with shut-off valves on both sides. This lets you isolate a single filter for a quick cleaning or replacement without having to drain your entire system. By following this sequence, your rainwater collection system installation will deliver clean, pressurized, and safe water for any need.
Maintaining Your System for Peak Performance
Your rainwater collection system installation isn’t truly finished once the last pipe is connected. A better way to think about it is as a living part of your home—it needs a little routine care to really thrive. With consistent maintenance, you'll get clean, reliable water for years, protecting your investment and stopping small issues from turning into expensive headaches.
This isn’t some massive time commitment, either. A simple, seasonal schedule is really all it takes to keep things running like clockwork. The real goal is to be proactive. For example, a single clogged gutter can easily cut your collection in half during a good rainstorm, and a neglected filter can start to affect your water quality.
It's no surprise that interest in these systems is growing. The rainwater harvesting market is already valued at around USD 1.6 billion, and it's projected to climb as more people look for sustainable water solutions. This trend is especially strong here in North America, where things like water scarcity and government incentives are pushing more homeowners to make the switch. You can discover more insights about the rainwater market growth on imarcgroup.com to get a feel for how this movement is reshaping water management.
Your Seasonal Maintenance Checklist
To keep things simple, I've broken down the must-do tasks into a seasonal rhythm. Follow this straightforward checklist, and your system will stay in top shape all year.
- Pre-Rainy Season (Fall/Early Winter): This is your most critical check-up. Before the serious rains start, you need to give your gutters and downspouts a thorough cleaning. Get all the leaves, twigs, and other gunk out of there. Don't forget to inspect and clean any gutter screens or leaf guards to make sure water can flow freely.
- Post-Rainy Season (Spring): Once the wet season winds down, it's the perfect time to check for any wear and tear. Look over all the seals and fittings for drips, give the tank a visual inspection for any damage, and be sure to clear out the first-flush diverter—it will have collected its fair share of sediment over the winter.
This kind of regular upkeep does more than just maximize your water collection; it becomes part of your property’s overall health. It fits right into a bigger picture of eco-friendly living, much like our philosophy on sustainable landscape design, where every single element works in harmony.
Annual and As-Needed Tasks
Beyond the seasonal rounds, a couple of other jobs should be on your annual to-do list. These deeper maintenance steps are what ensure the long-term health and safety of your system.
The single most overlooked task I see is the tank inspection. At least once a year, you really need to check your tank for sediment buildup. A fine layer of sludge will naturally form at the bottom over time. A little bit is normal, but too much can impact water quality and even become a breeding ground for bacteria.
Here are the key annual tasks to keep in mind:
- Tank Clean-Out: Depending on how good your pre-filtration is, your tank will likely need to be drained and cleaned out every 3-5 years. This process gets rid of all that accumulated sediment and keeps the inside pristine.
- Filter Service: Check and replace your filter cartridges based on what the manufacturer recommends, or whenever you notice a drop in water pressure. A clogged filter is a problem—it makes your pump work way harder and kills your flow rate.
- Winterization (For Colder Climates): This is non-negotiable if you live where it freezes. You MUST winterize your system. Drain all the pipes, the pump, and the filters to prevent trapped water from freezing, expanding, and cracking them. You'll also want to disconnect the downspout from the tank to prevent ice from damming up.
Common Questions About Rainwater Collection
Even after walking through a step-by-step guide, it’s only natural to have a few lingering questions. In my experience, every homeowner does. This is a big project, and you want to get it right.
So, let's tackle some of the most common questions I hear. Getting these cleared up now will give you the confidence to move forward and build a system you can truly rely on.
Is Rainwater Actually Safe to Drink?
This is almost always the first question I get. The short answer is: yes, it can be, but not directly from your roof.
Rainwater itself is incredibly pure. The issue is that it picks up all sorts of things on its journey to your tank—dust, pollen, bird droppings, and anything else sitting on your roof or in your gutters.
For garden use, a simple screen and a basic sediment filter are usually enough. But if you want to drink the water, you must filter and purify it properly. This isn't a place to cut corners.
A proper purification setup for drinking water typically involves a few key stages:
- A sediment filter to catch the bigger stuff like grit and leaves.
- An activated carbon filter to handle organic chemicals and dramatically improve the taste and smell.
- A UV sterilizer, which is the final and most critical step. It zaps 99.99% of bacteria, viruses, and other nasty microbes, making the water safe to drink.
How Much Does a Rainwater System Cost?
The cost can be all over the map, and it really hinges on what you’re trying to achieve. It depends entirely on the size, complexity, and whether you're a DIYer or hiring a pro.
You could put together a simple 55-gallon rain barrel for your garden for under $200. It's a great weekend project.
But if you're looking at a larger system for serious landscape irrigation—say, a 1,000-gallon tank with a good pump and filtration—you’re more likely in the $2,500 to $5,000 range. For a whole-house system that provides potable water, with all the advanced purification gear, the investment can easily top $10,000.
Do I Need a Permit for Installation?
This is a big one, and the answer is always, "Check with your local authorities." Water rights and building codes change from one town to the next.
Some places have virtually no rules, while others require permits, especially for larger tanks or any system that connects to your home's plumbing.
Before you spend a dime on parts, call your local building department and county health department. If you have one, check with your HOA, too. Clarifying the rules upfront will save you from potential fines or, even worse, having to tear the whole thing out.
On the bright side, many communities are now actively encouraging rainwater harvesting. You might even find rebates or other incentives to help with the cost. It’s a smart response to growing water challenges.
This is happening worldwide. With over two billion people facing water stress—a number that's only going up—governments are looking for practical water-saving solutions. In fact, some cities have seen rainwater harvesting adoption jump by 35% in just a couple of years. You can read the full research on the rainwater harvesting market to get a sense of how quickly things are changing.
What Is the Best Roof Material for Collection?
The type of roof you have makes a huge difference in both the quality and quantity of water you'll collect. The smoother and less porous, the better.
- Best: Metal (steel, aluminum) and sealed tile roofs are the gold standard. They're non-toxic, water sheds off them beautifully, and they're easy to keep clean.
- Good: An asphalt shingle roof will work, but it's not perfect. Shingles can leach small granules and petroleum compounds, which means your pre-filtration has to work a bit harder.
- Avoid: I'd stay away from wood shake, tar and gravel, or old asbestos roofs. They release tannins, chemicals, and other contaminants that are a nightmare to filter out, making the water unsuitable for most uses.
Ready to transform your outdoor space with smart, sustainable solutions like a professionally designed rainwater collection system? The team at Tamura Designs Landscape and Construction has over 30 years of experience creating beautiful and functional landscapes across Silicon Valley. We can help you integrate a water-wise system that complements your home and lifestyle.
Visit us at Tamura Designs to schedule your consultation.